
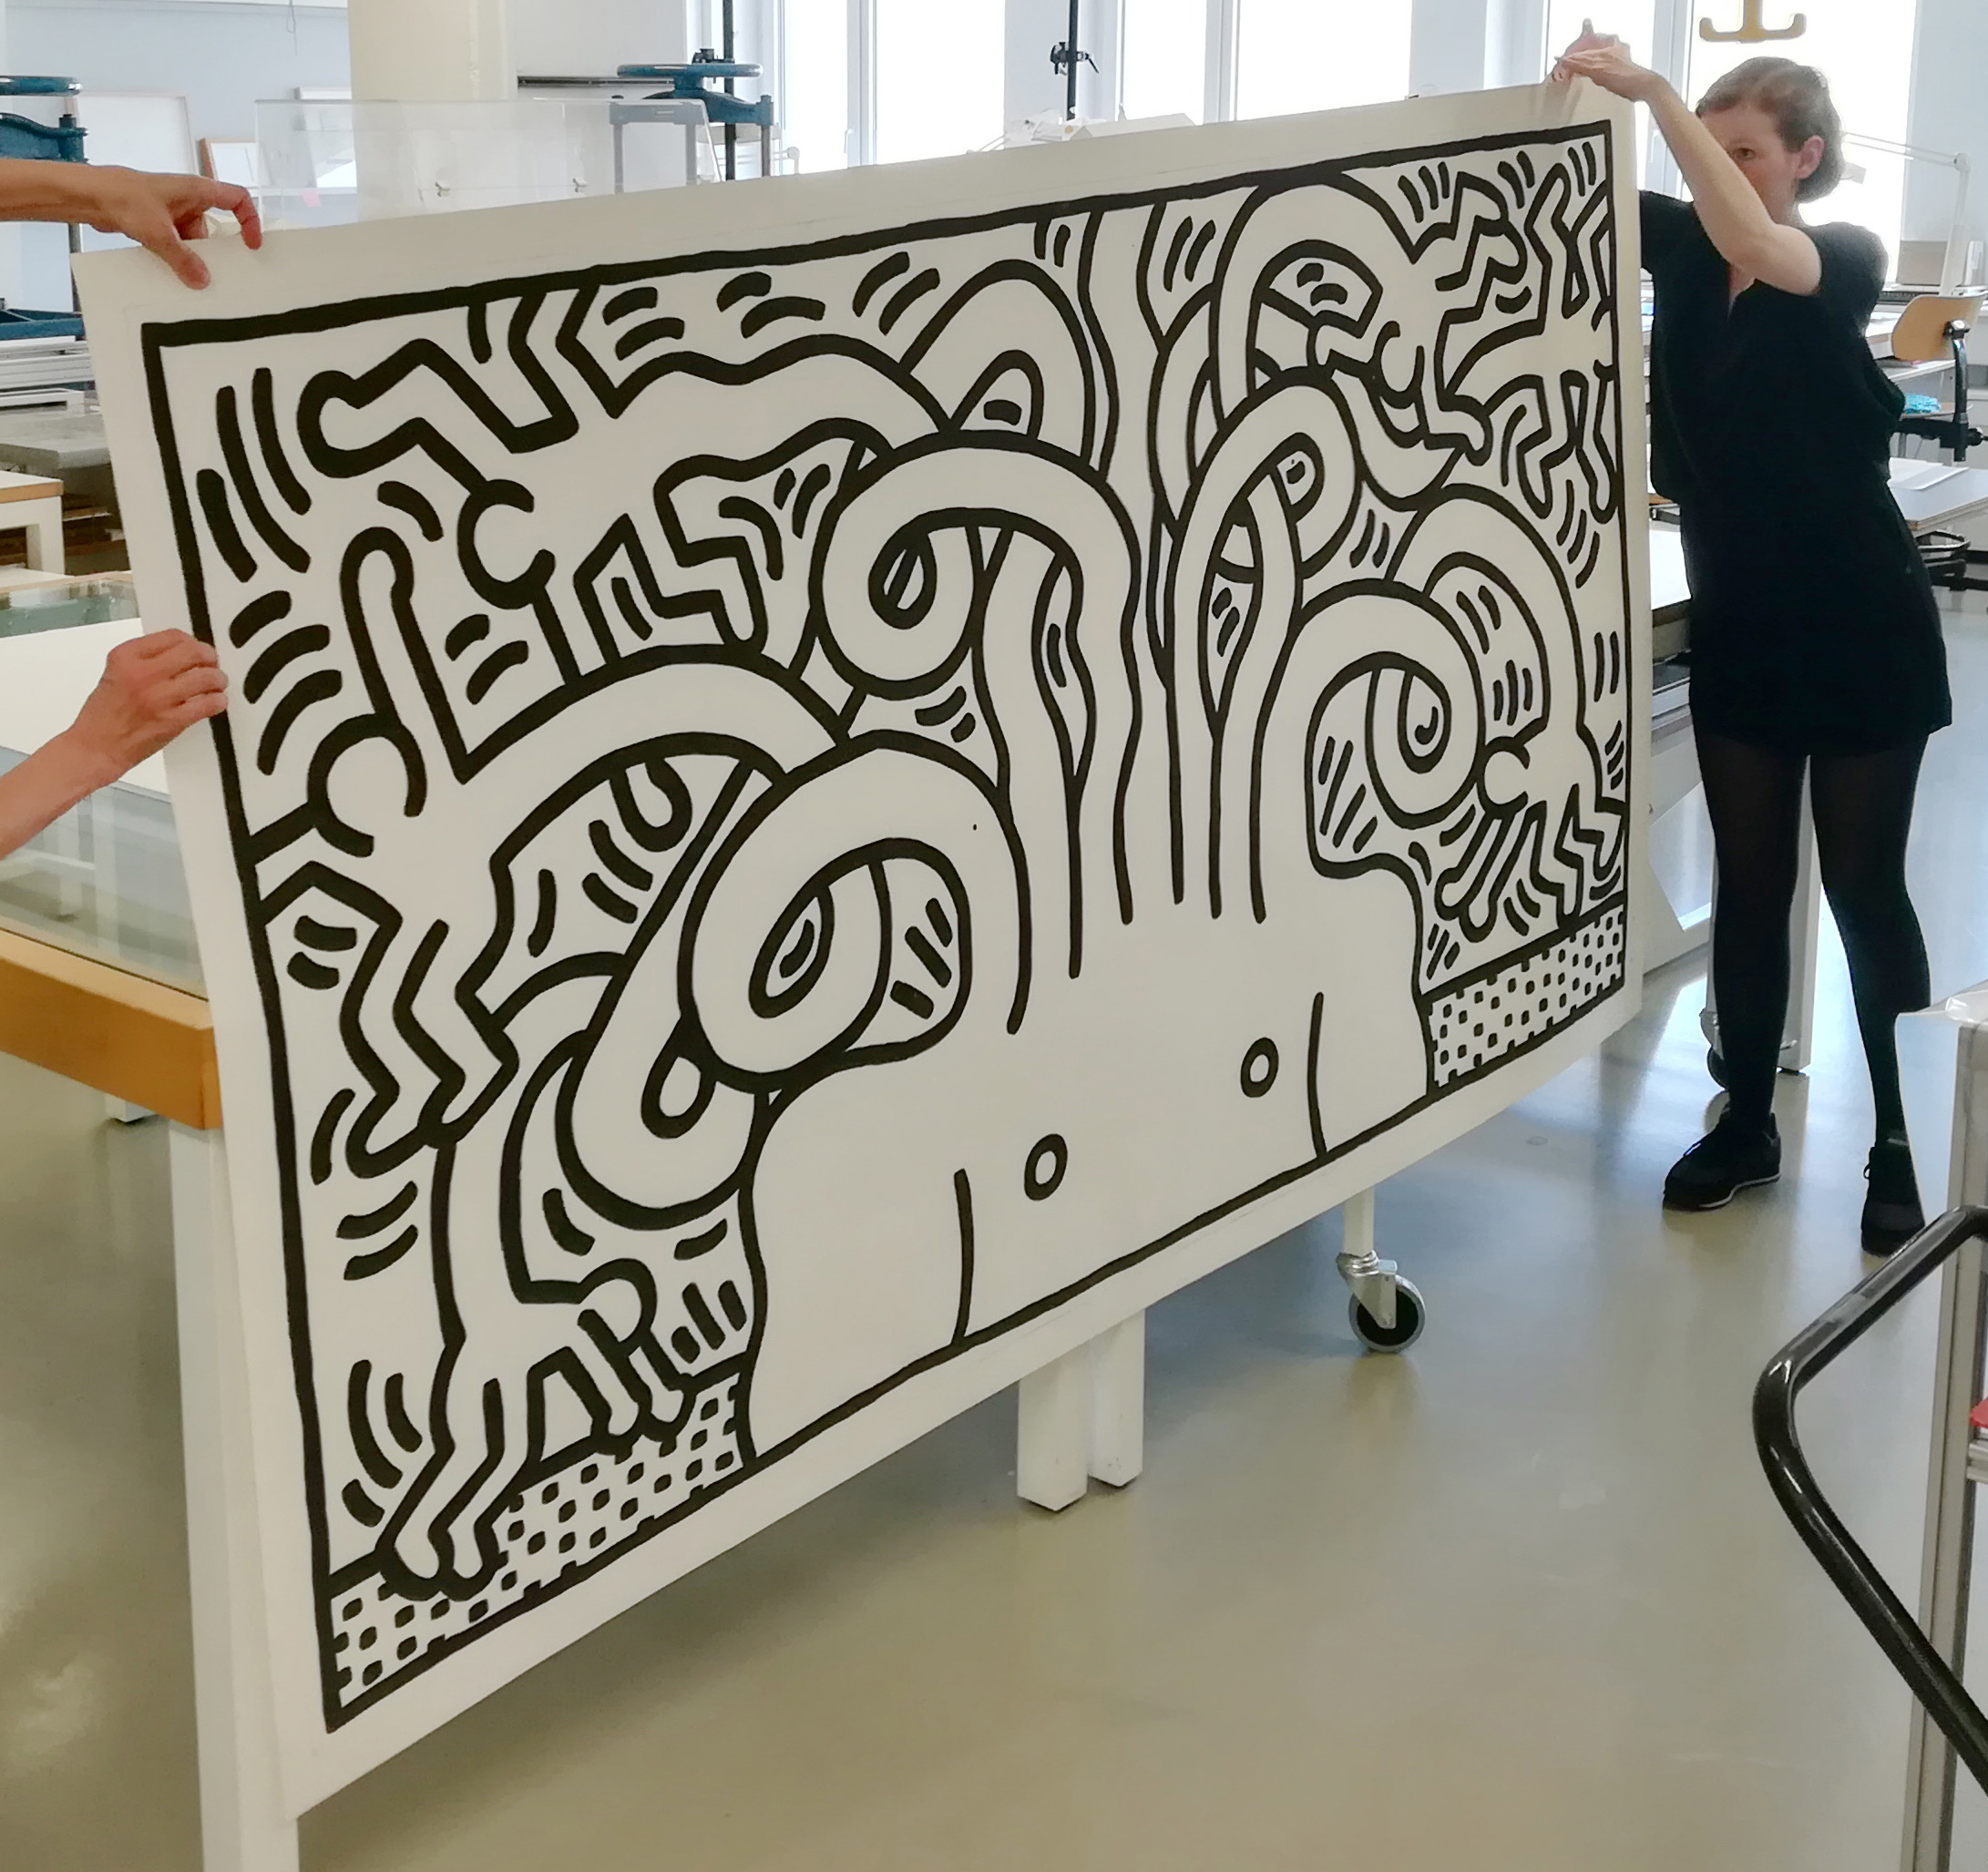
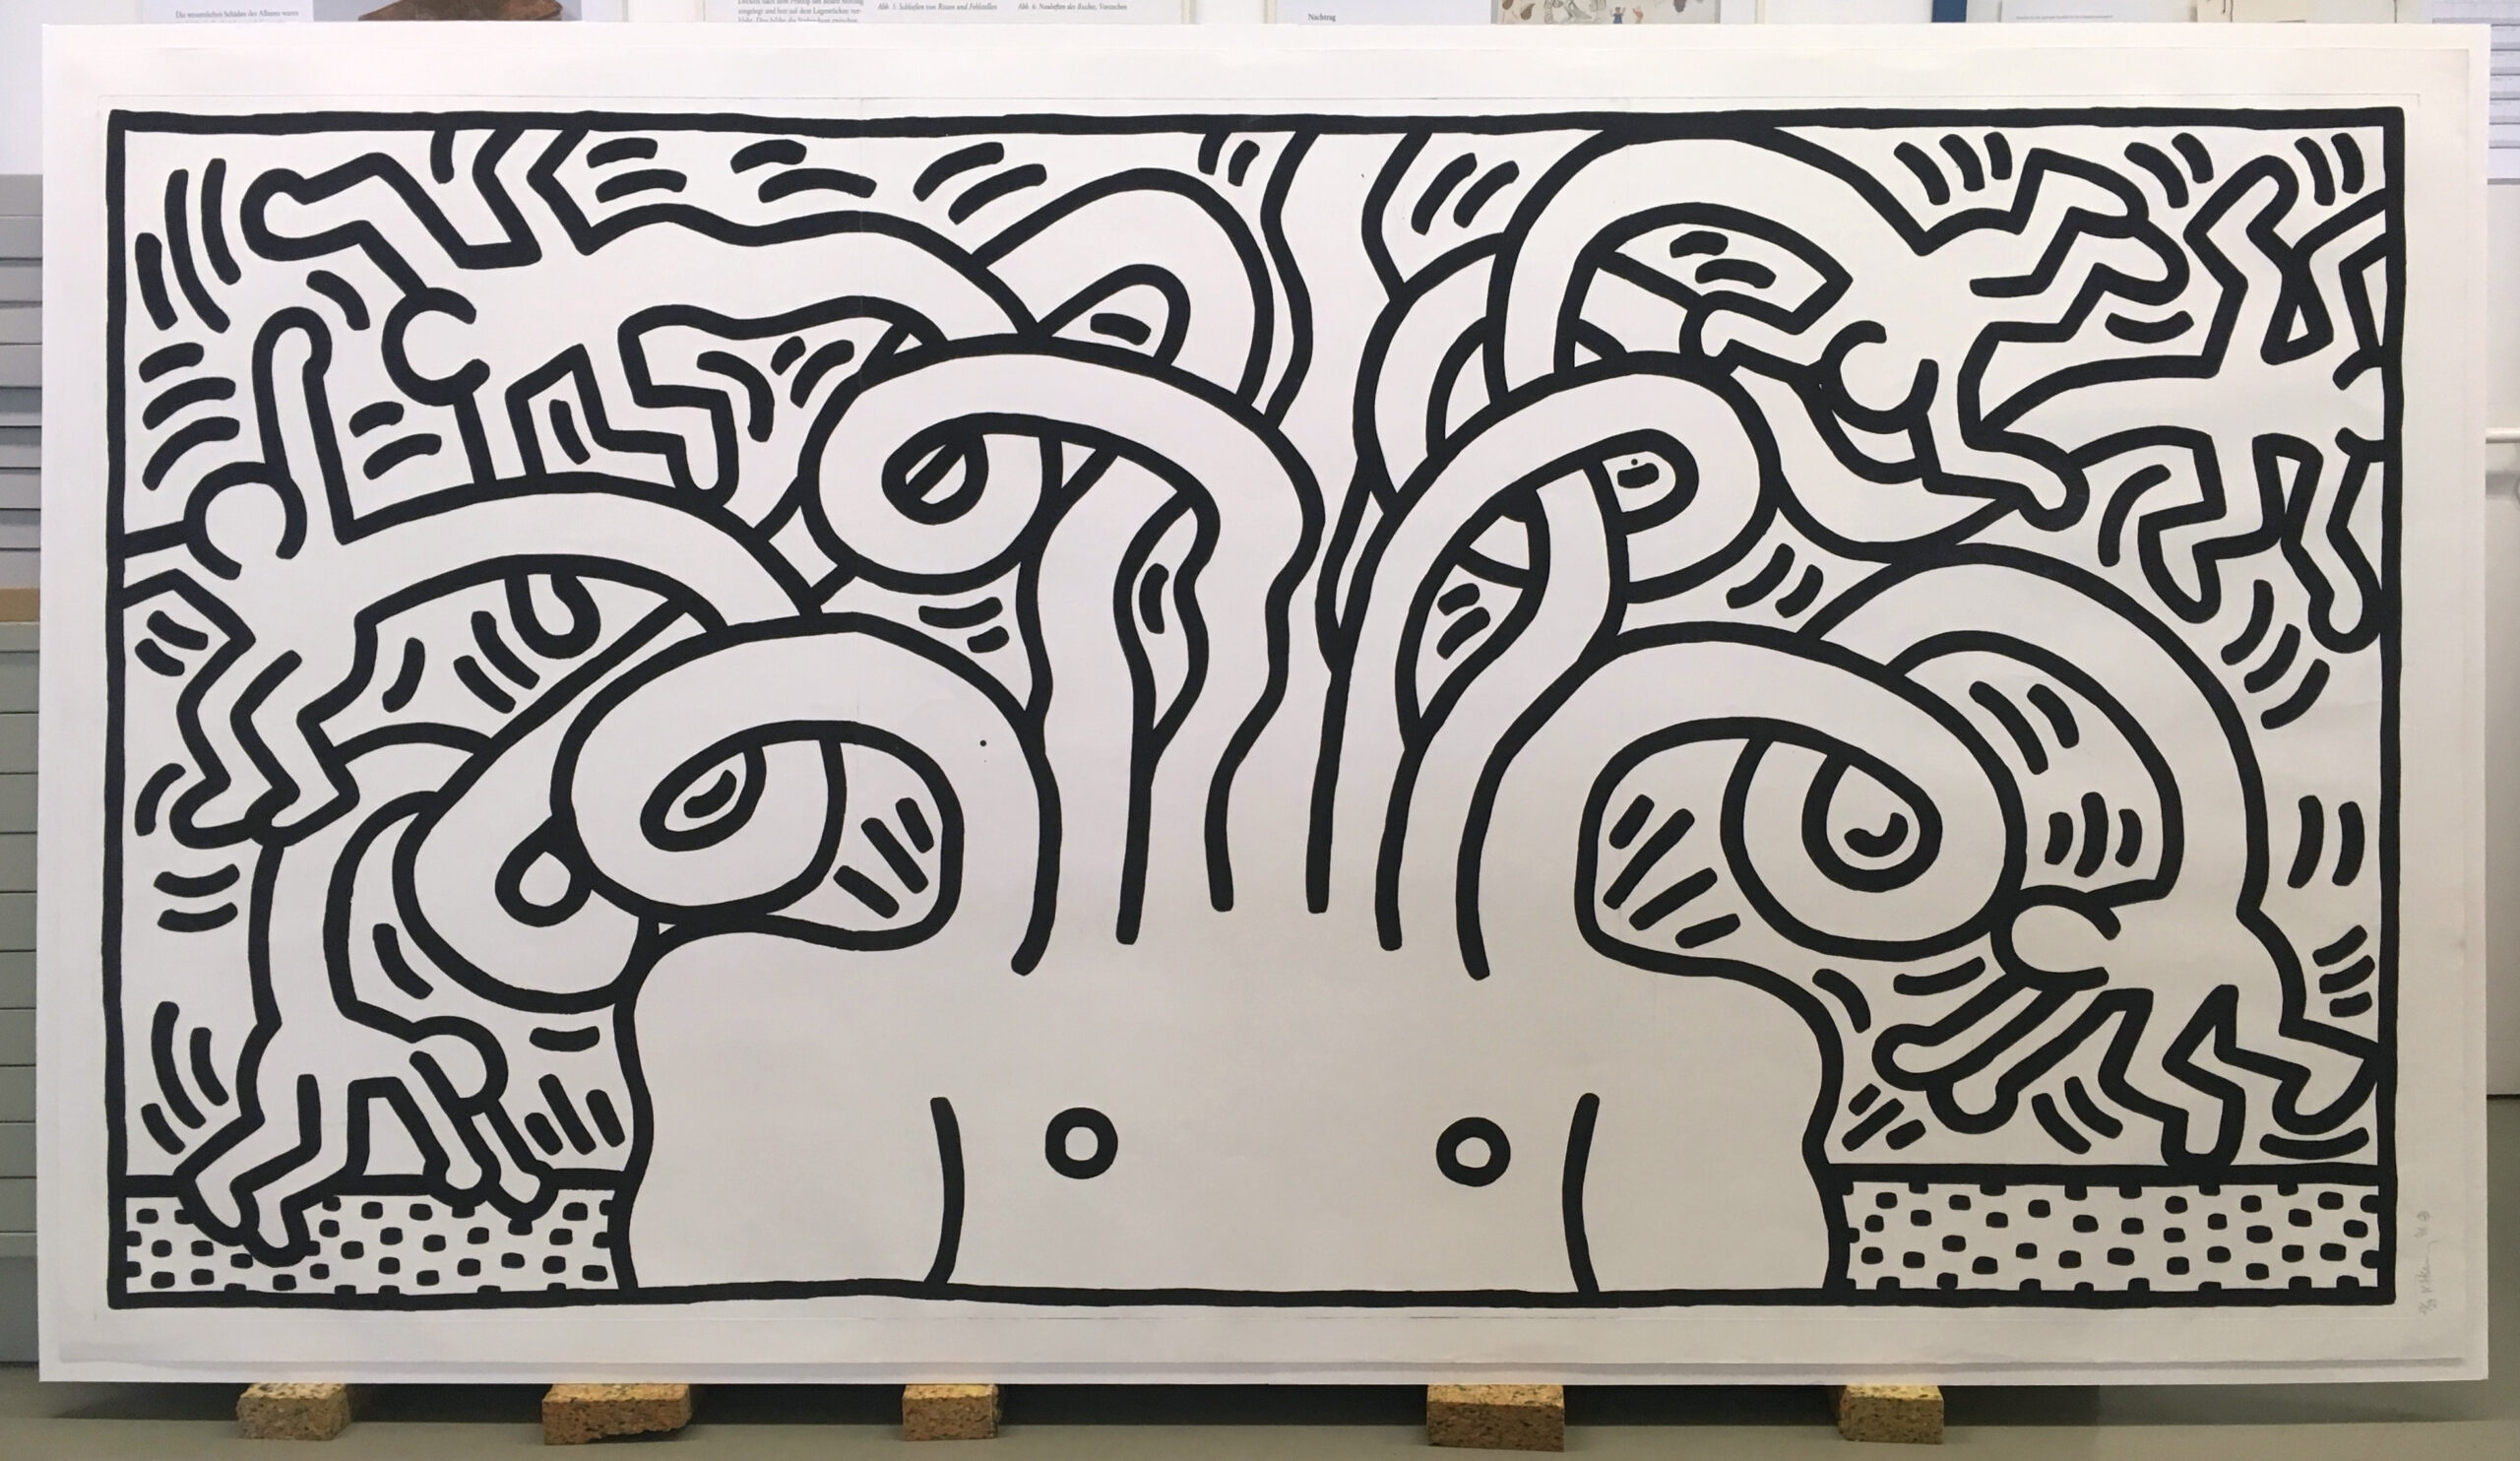
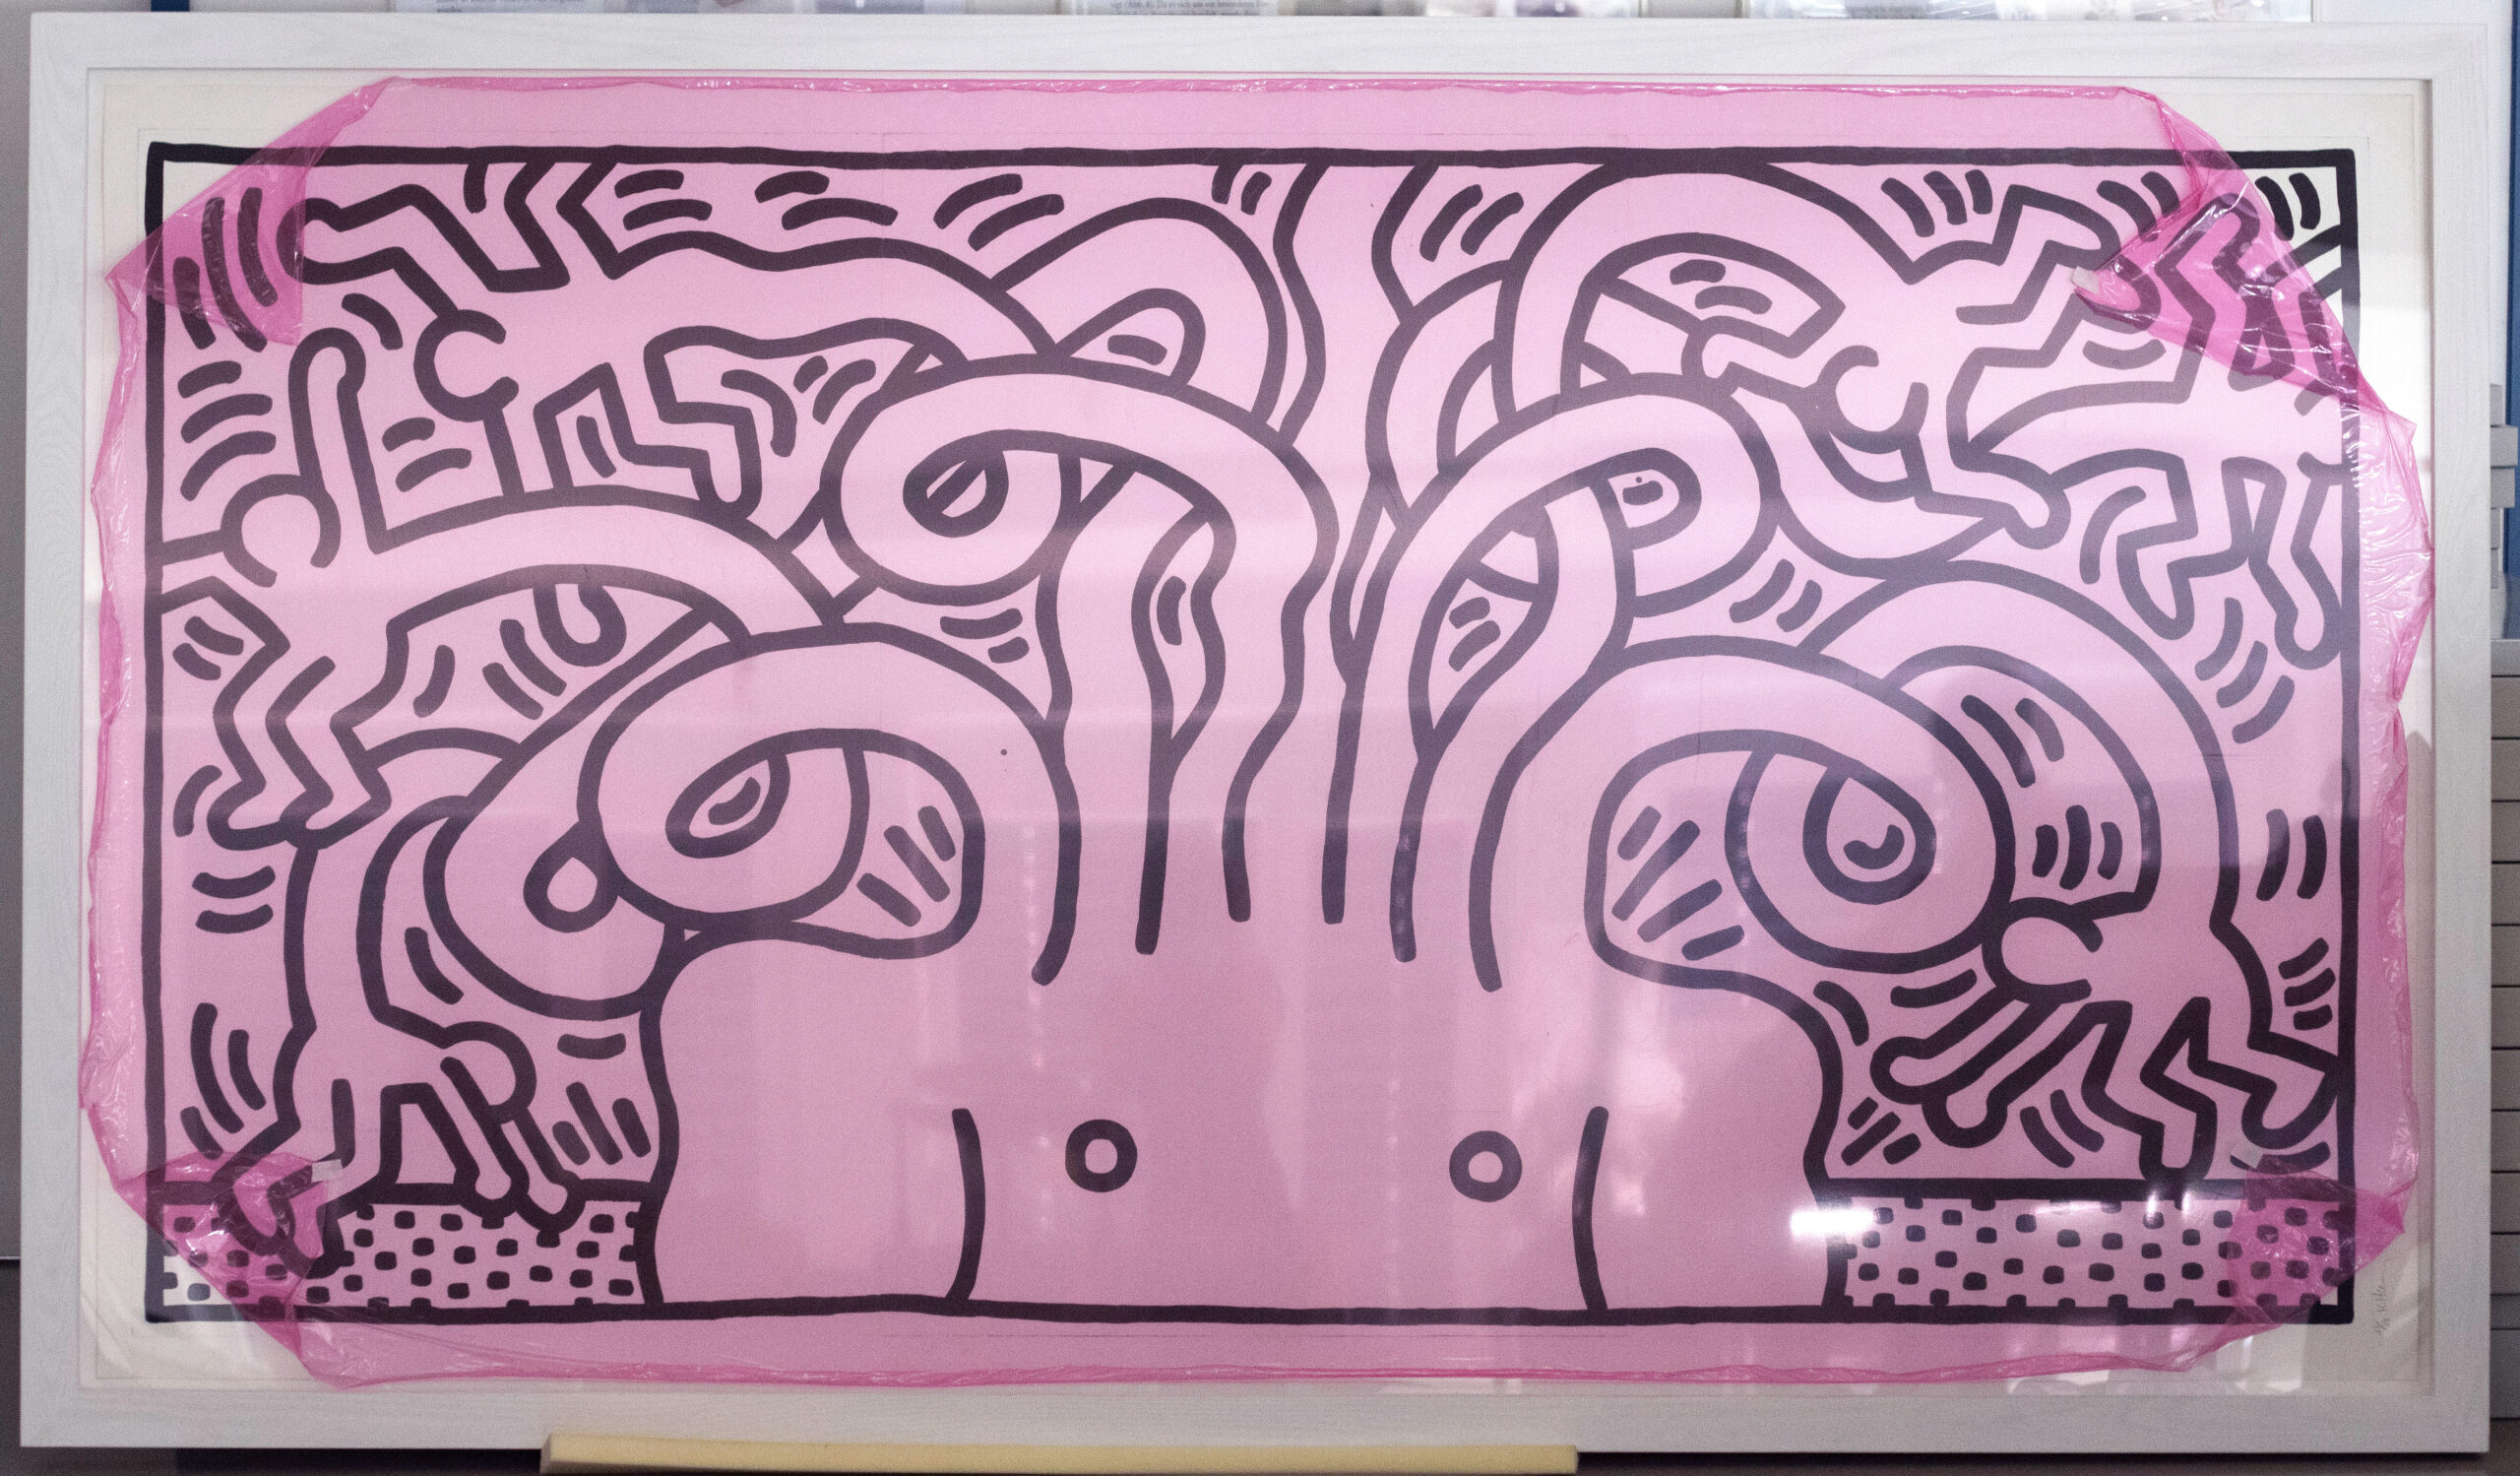
The print, entitled Medusa Head, was created in 1986 in the studio Niels Borch Jensen Gallery & Editions in Copenhagen. Printed in an edition of 24, it was the largest work in Haring’s print œuvre (1.4 x 2.5 m).

CONDITION
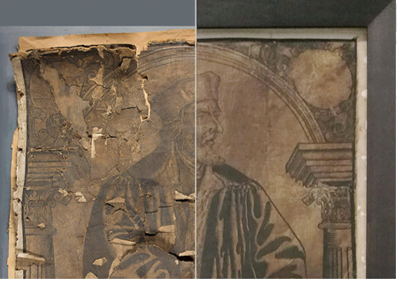
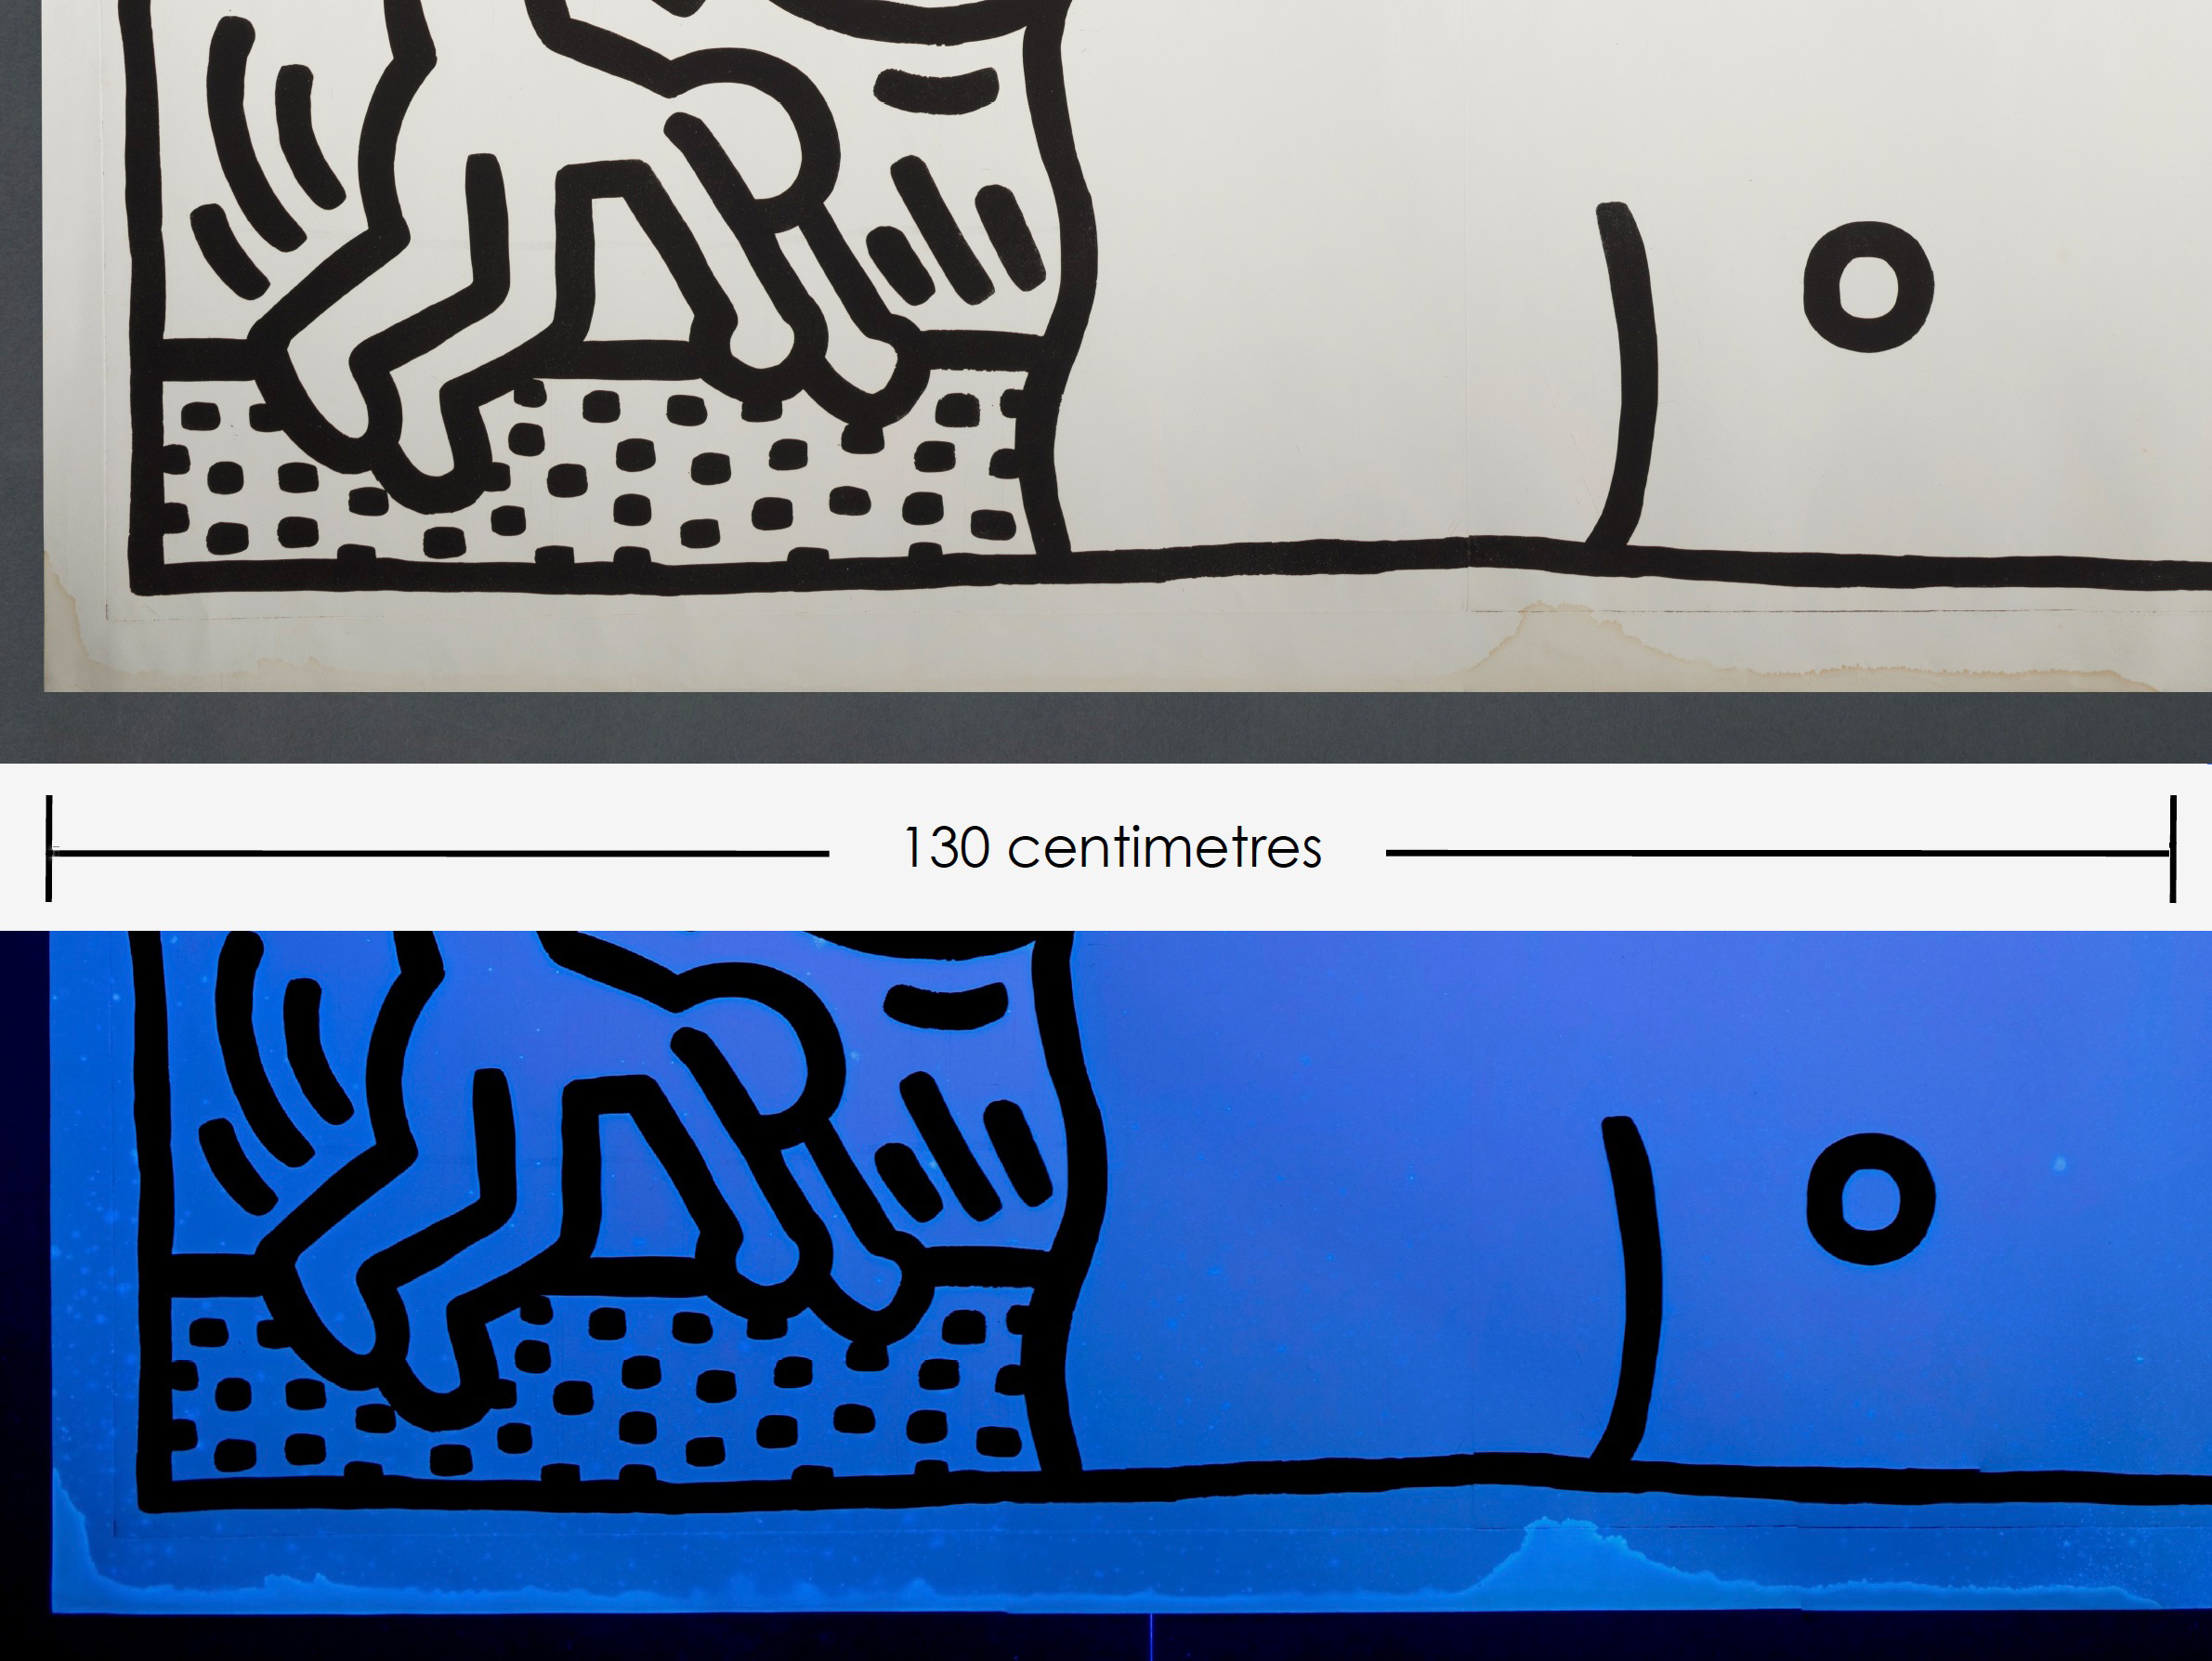
The print suffered tide lines along its top edge and the bottom edge. There, the staining was most severe on the left side. The stains had been caused by water seeping into a wooden frame in which the print had been housed. The upper photo shows the print in visible light (VIS). The lower image taken under ultraviolet radiation (UVA) accentuates the staining by its UV-induced visible fluorescence.
THE PRINT
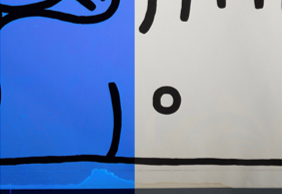
The aquatint was printed from three large plates arranged directly next to each other on the paper. In this photo, you can see a vertical line where two plate edges met for printing.

Small unprinted gaps between the plate edges were retouched at the Copenhagen print studio with a black felt-tip pen to conceal the white paper. The printer Niels Borch Jensen confirmed that this had been done with the artist's consent. For this reason, we had to consider the retouching as part of the original – the felt-tip pen lines had to be preserved.

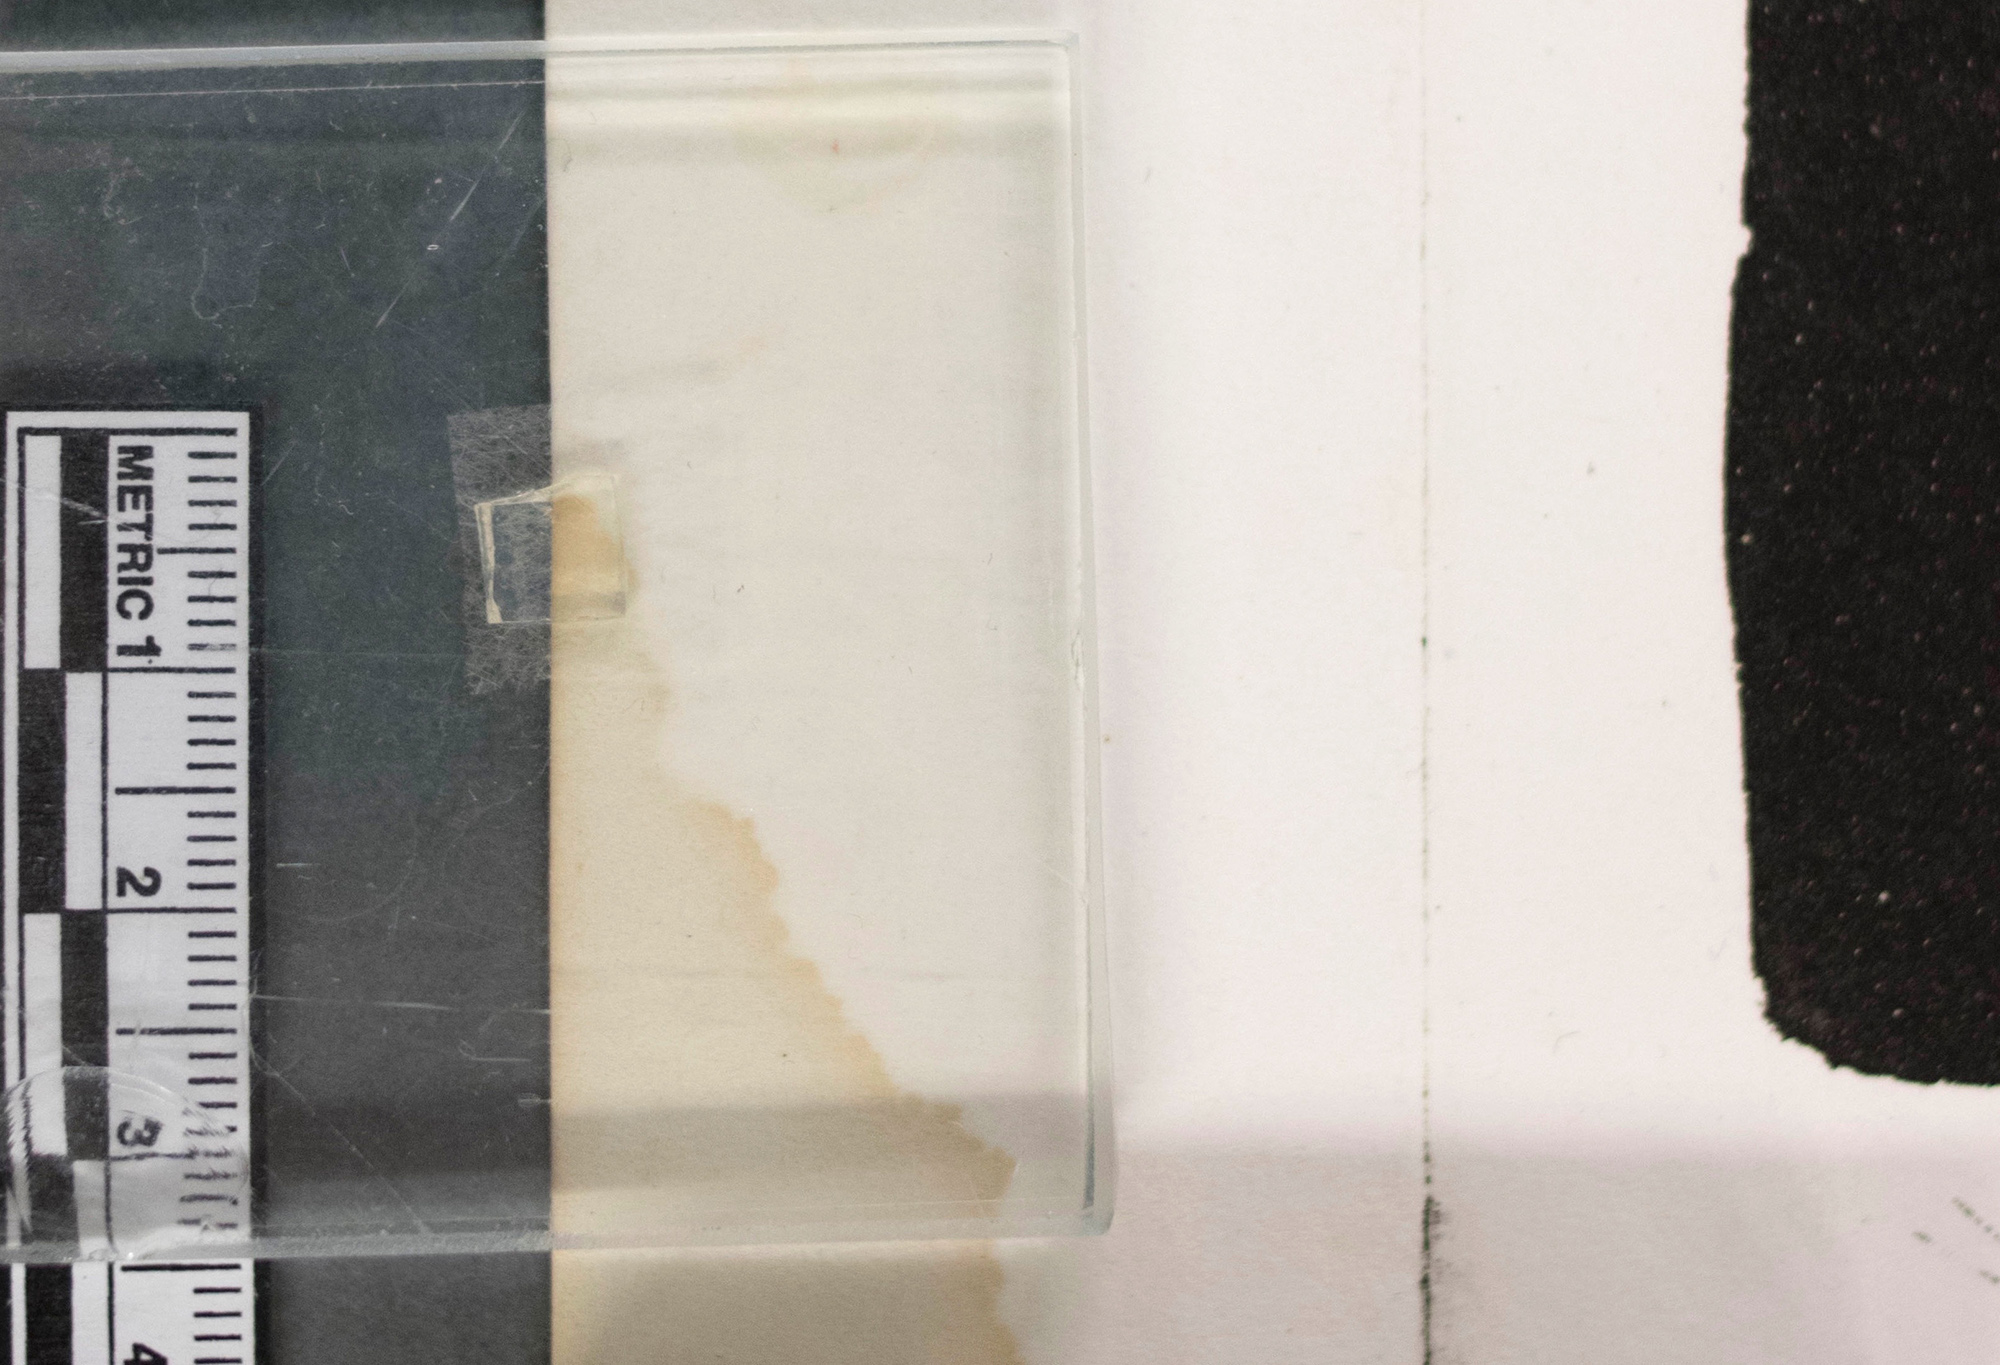
The black felt-tip pen lines proved to be highly water-soluble, as indicated by a test: A tiny water droplet was placed on one small spot on the surface of the retouching. After a short moment, the water was soaked up using an absorbent filter paper. Two more repetitions of the test, done in the same spot to intensify testing, transferred greater amounts of the felt tip pen colorant to the filter paper. The water-soluble felt-tip pen was a key reason we decided against immersion washing for tide line reduction.

TESTING LOCAL TREATMENT METHODS ON MOCK-UPS
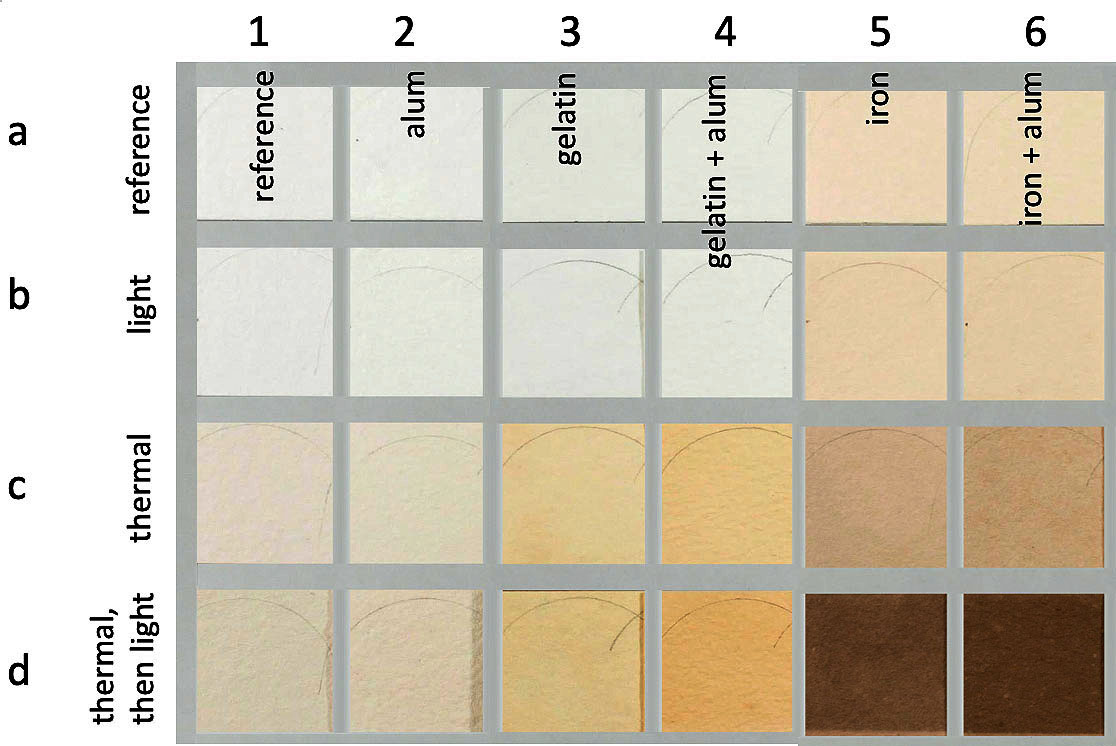
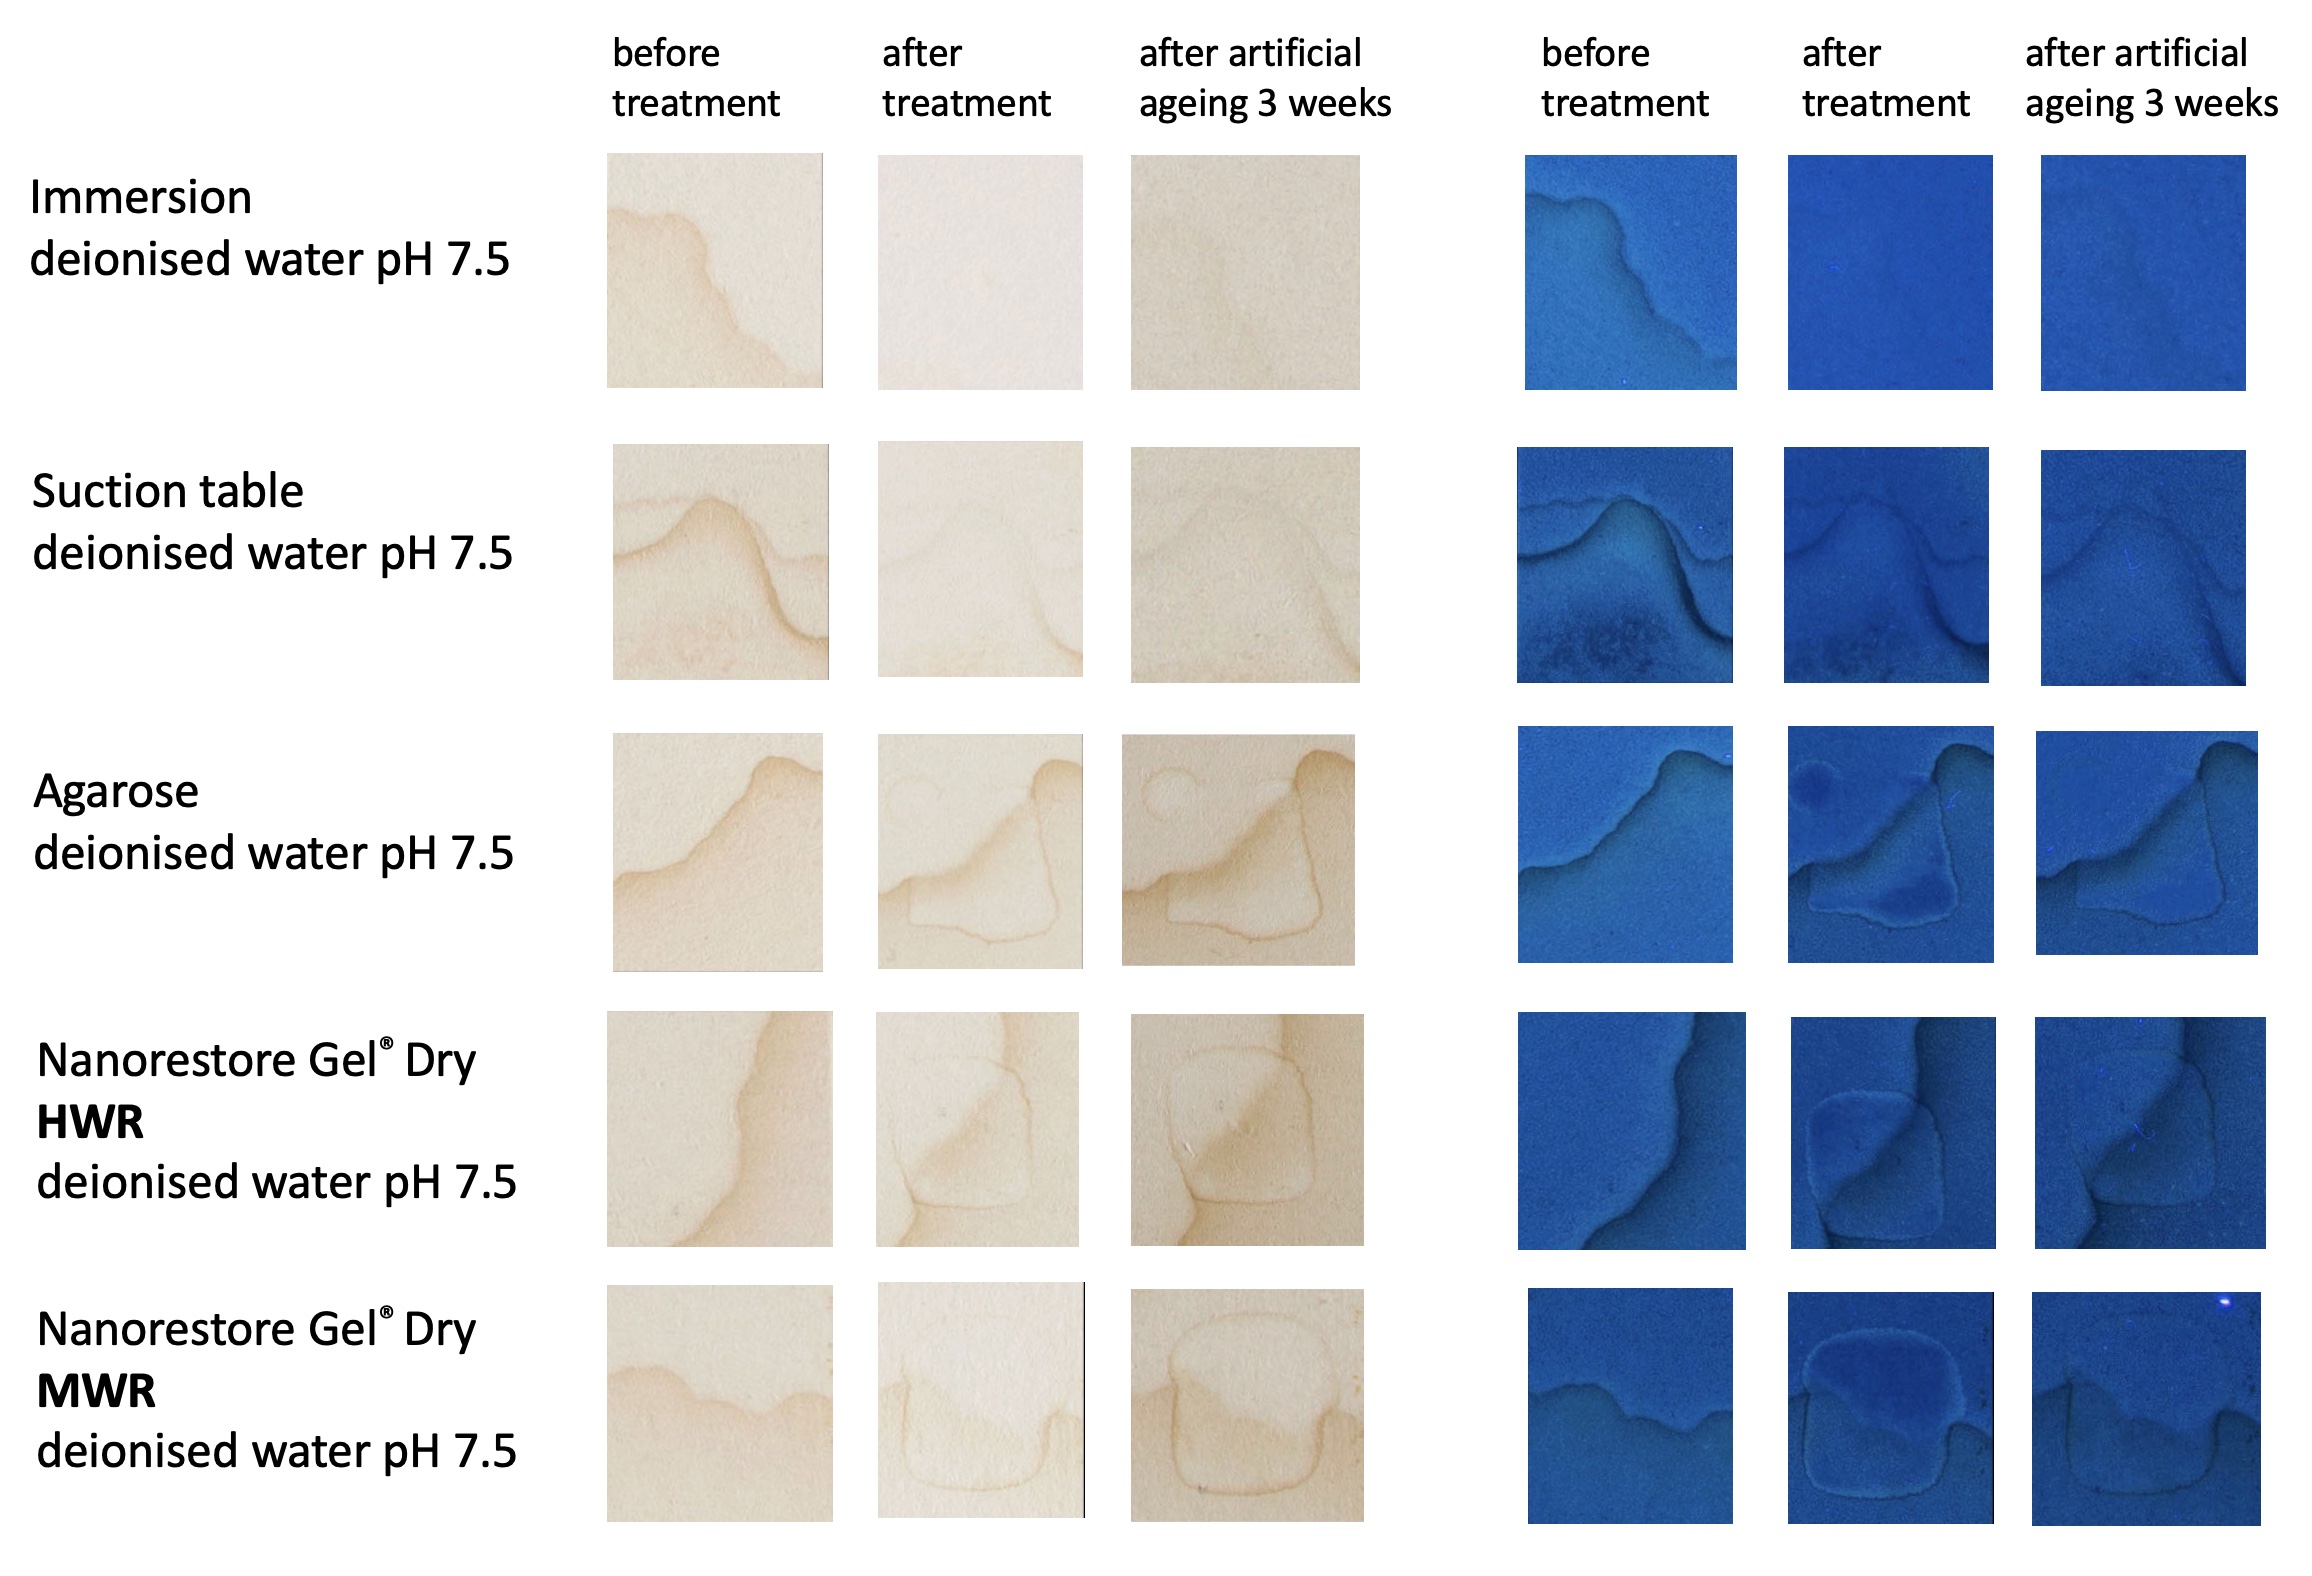
Since immersion washing was no option, we tested several methods of local stain removal. For this purpose, mock-ups of modern papers were stained using an aqueous extract of ground hardwood powder. This mimicked the staining on the original print. The mock-ups allowed us to test the most effective local washing method that would also minimize tideline migration, which is a risk associated with any local aqueous treatment of discolored paper.

Several local washing methods were tested on the mock-ups using deionized water. One set was immersion-washed and served as control (top row). Of the local treatments, suction table washing was as effective as immersion washing, confirming previous research (Yuki Uchida, Masamitsu Inaba, Takayashu Kijima. Evaluation of aqueous washing methods of paper by the measurement of organic acid extraction. Restaurator, 2007, 169–184). All three tested poultices caused tide lines, but the Nanorestore Gels® Dry were more effective for stain removal than the agarose.
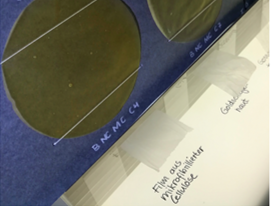
To narrow down further the most suitable washing method for Medusa Head, the two most effective treatments – suction table and poulticing with Nanorestore Gel® Dry – were tested on small spots on the original (the photo shows the gel test), previous to embarking on the full treatment. The suction table treatment proved more effective and was chosen as the main washing method. It was complemented by Nanorestore Gel® Dry poulticing as discussed further below.
TREATMENT
Handling the print required special considerations throughout. This photo shows the print positioned for photography. It rests on a support that consists of archival cardboard stapled to a wooden frame. The support was moved so that the print could be placed under the camera in sections. The camera was mounted stationary above the print.

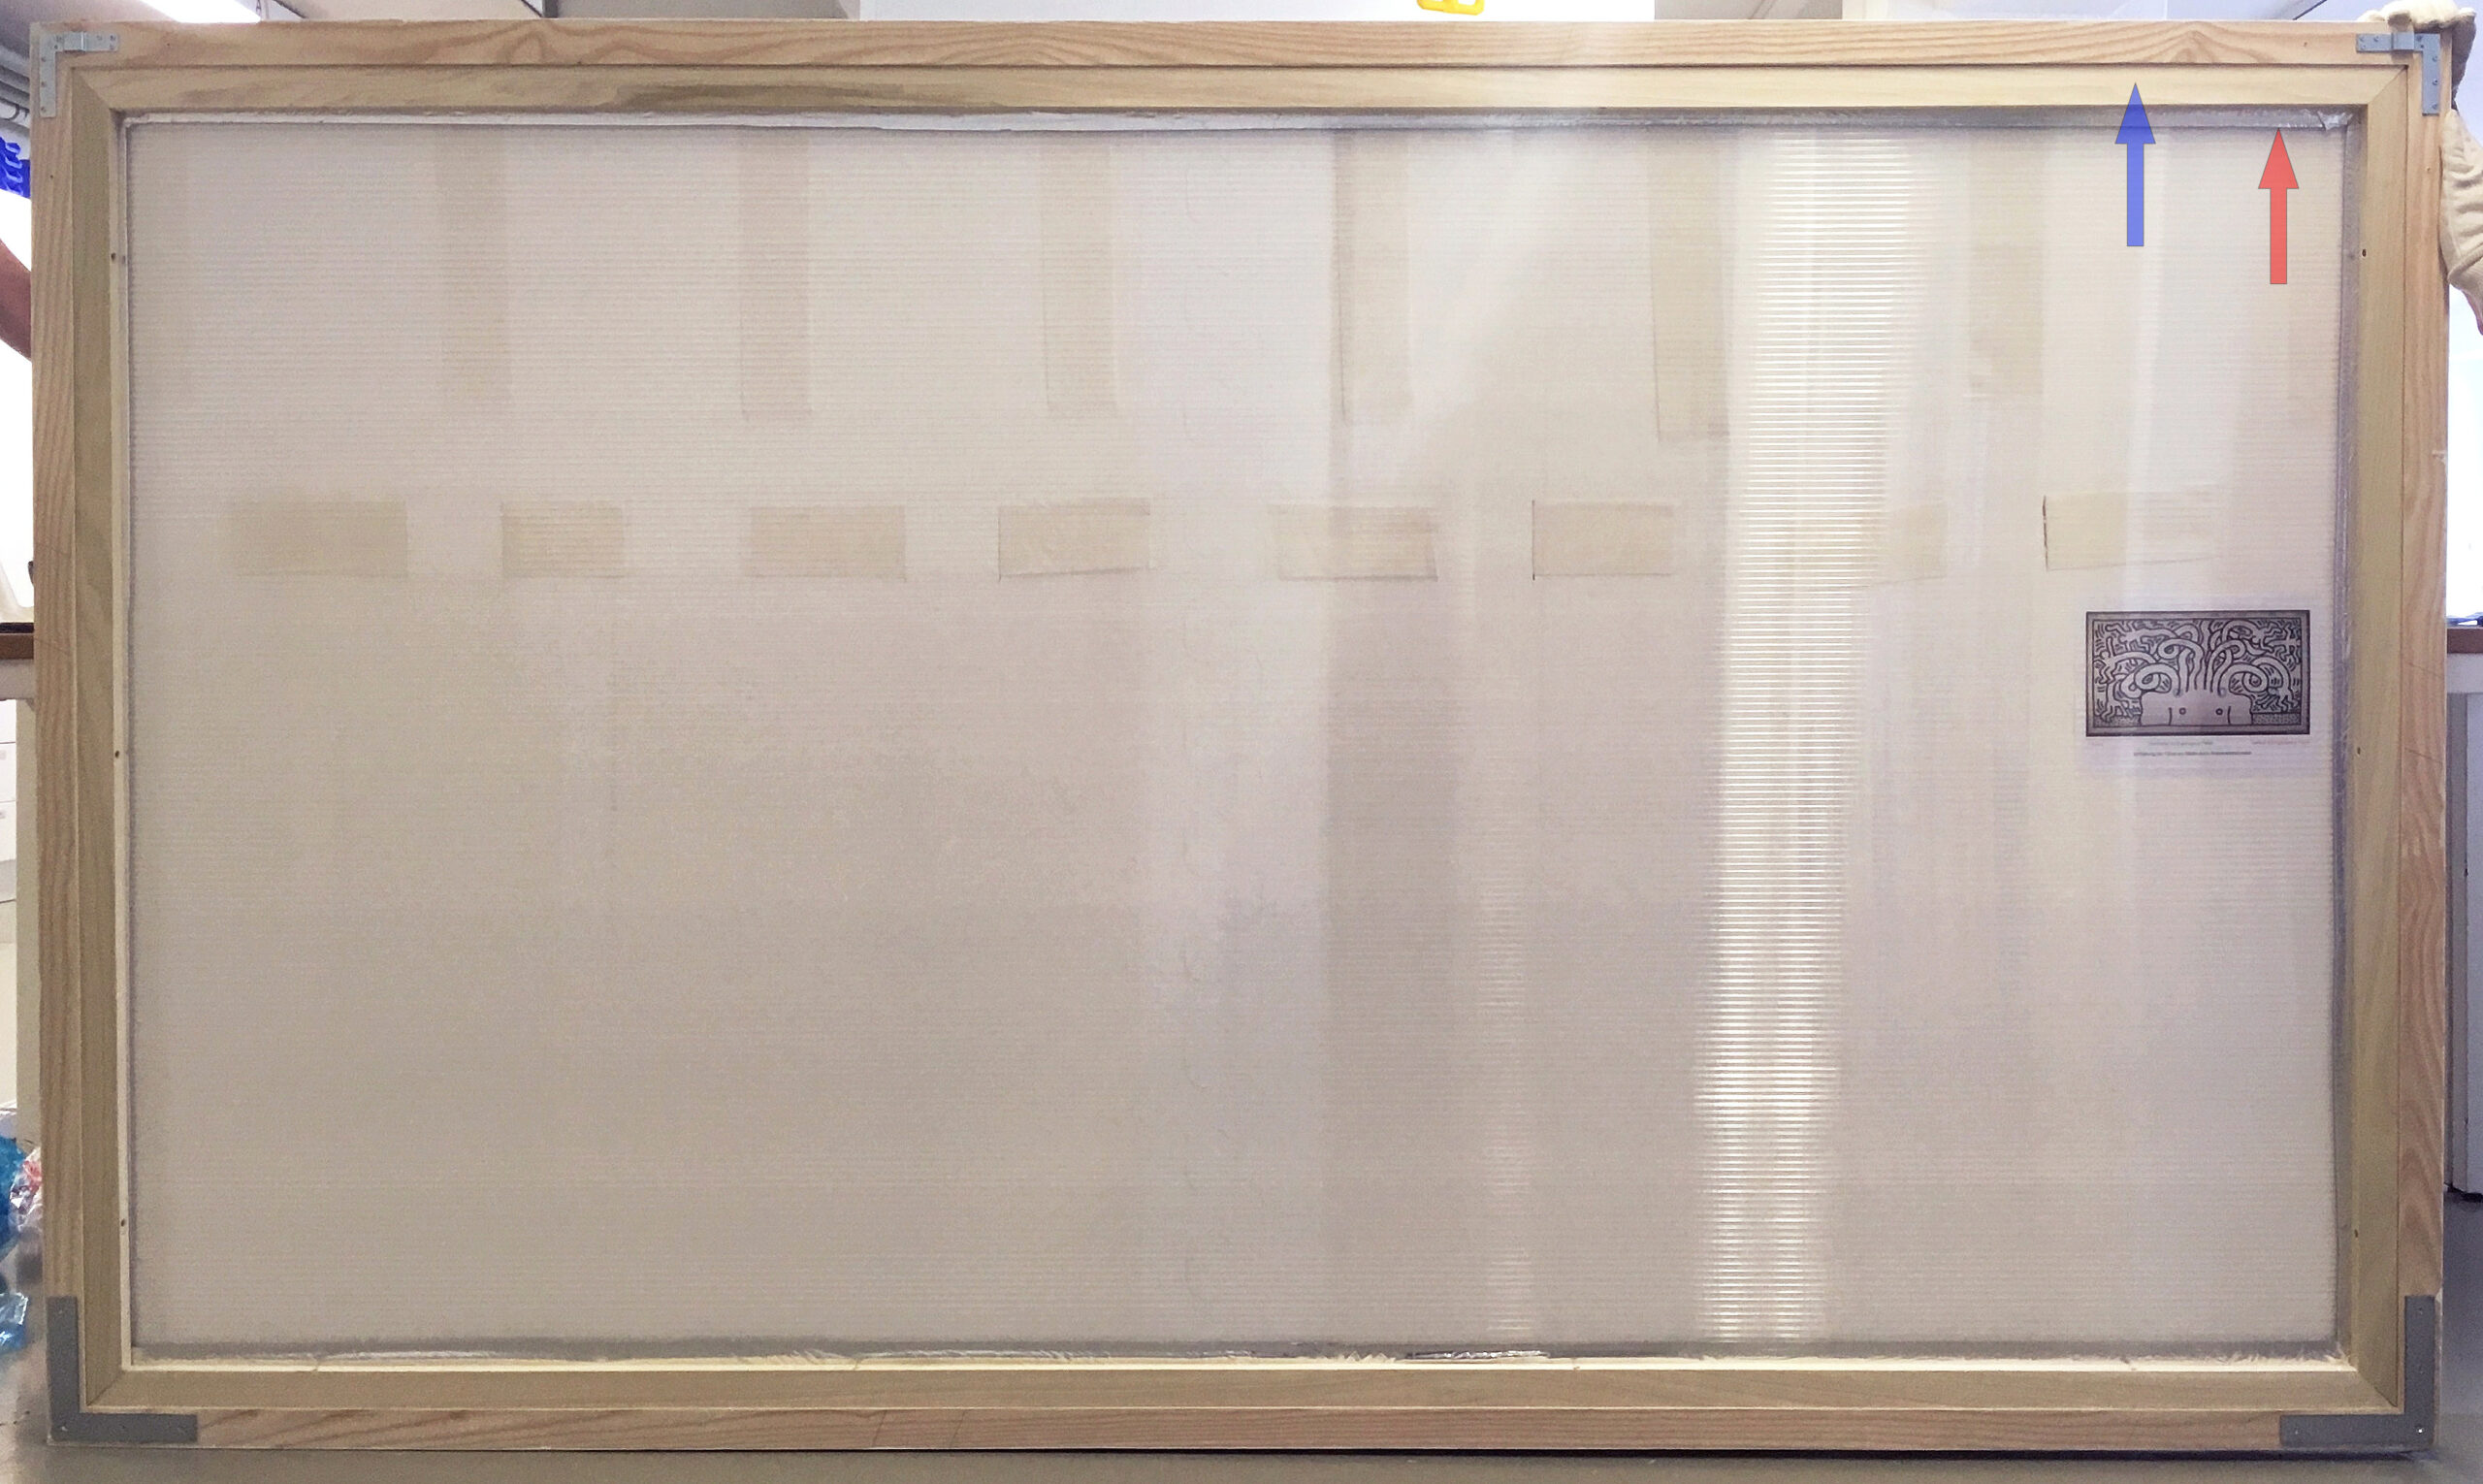
We started the suction table washing by first working in the small corner area (marked in red) where we had pre-tested the treatment method. This initial tuning step allowed us to optimize the treatment, which, in its fully developed state, included several stages of washing. Deionized water was used for most of the aqueous treatment.

With the print face-up on the suction table, small sections of the water stain were treated at a time. The relevant print section was covered with a polyester film so that only the water-stained area was exposed. Blotters were also placed around the treatment area to protect the surrounding print from water contact. Water was brushed on the tideline several times. Blotters placed under the print absorbed the water flushed through the paper. They were replaced as needed.

Between the brush applications of water, the treatment area was covered with filter paper to protect the print surface and even out drying while the vacuum pressure remained in action.

During the sequences of suction table washing, the print was dried to check the progress in treatment.

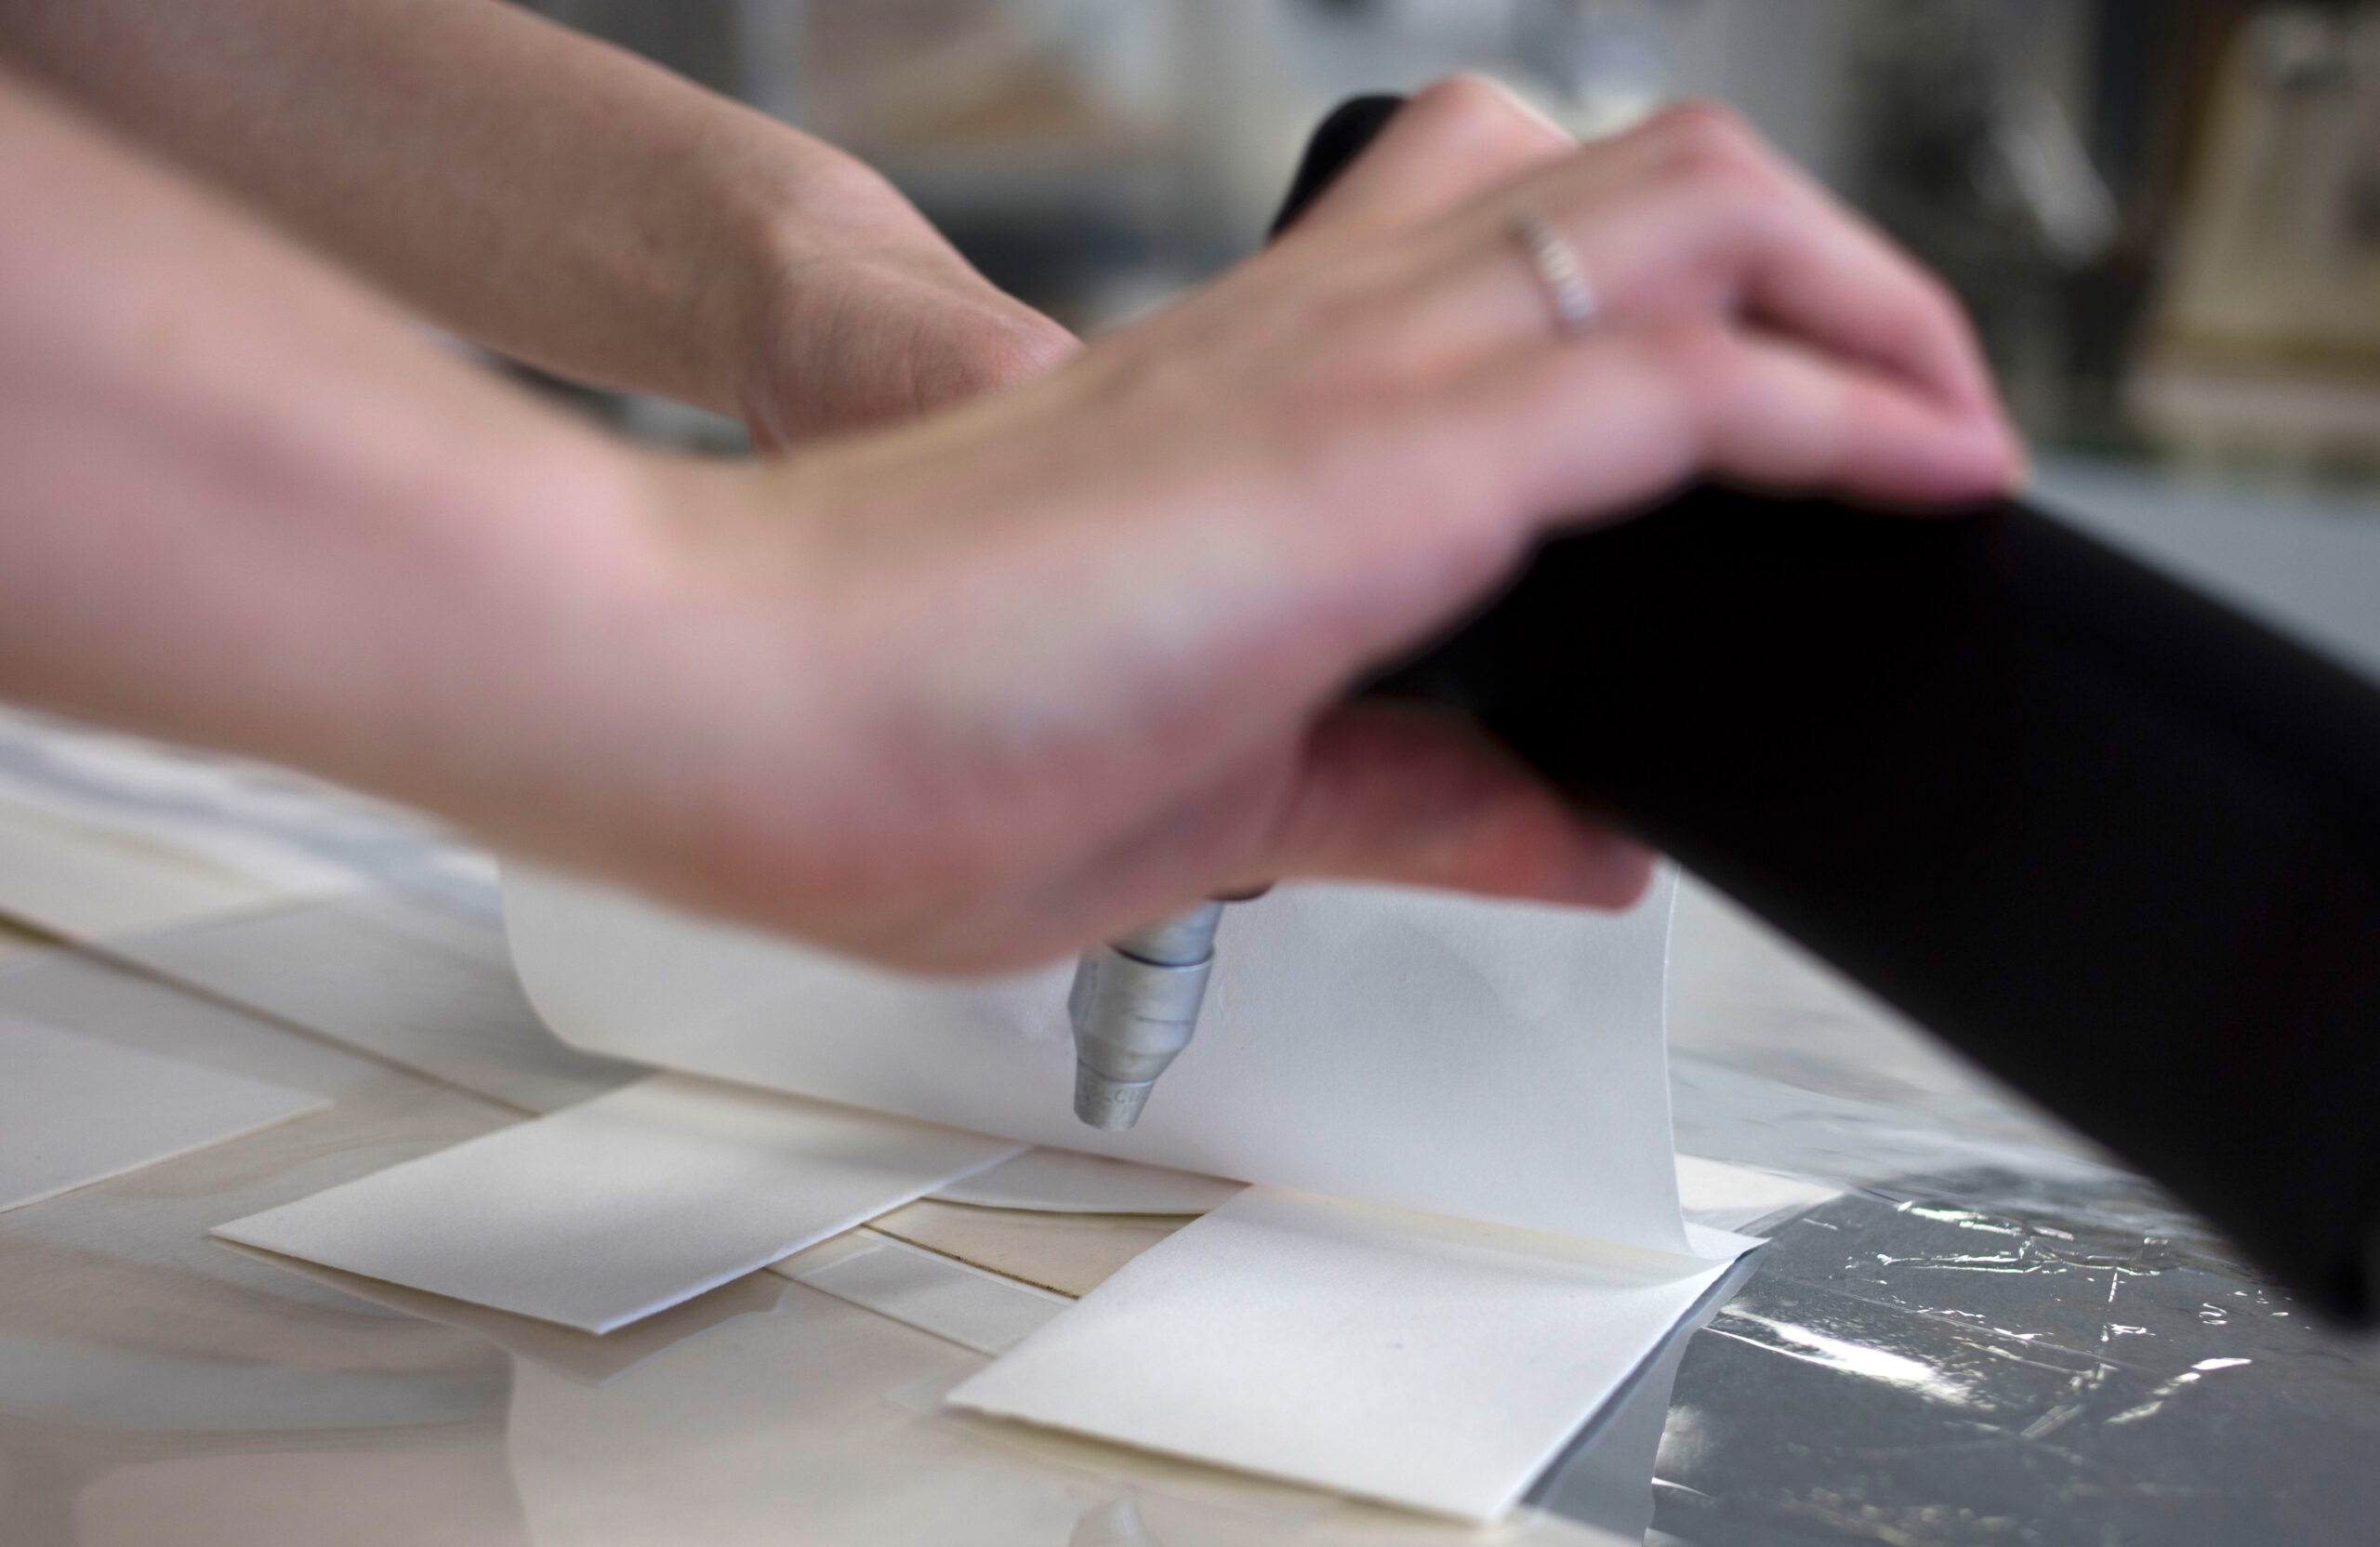
Hot water steam (ca. 90°C) directed across the tideline using the Preservation Pencil® concluded the washing step. This enhanced stain removal and diminished the risk of forming new tide lines.
The final washing step conducted recto was controlled with the aid of a UVA lamp positioned above the treatment area. It was switched on periodically to check for residues of tide lines that were more easily seen under UVA due to their fluorescence. The Preservation Pencil’s® hot water steam created a gradual transition between the wet and dry paper. Overall, each section required about 20–30 minutes treatment to complete washing.
After this extended local treatment on the suction table, the staining was significantly diminished. To reduce it further, we carried out a highly local hydrogen peroxide bleaching treatment (3% H2O2 adjusted to pH 9 with calcium hydroxide). This was followed by local rinsing on the suction table and a final misting with a calcium hydrogen carbonate solution for an alkaline reserve. This alkaline reserve was also applied on the suction table.
After the treatment recto was completed, residual tide lines could still be seen verso under UVA. The Nanorestore Gel® Dry HWR conditioned with deionized water was used verso to remove the residual tide lines. In the photo, strips of the gel are positioned along the edge of the print. They are covered with polyester film and lightly weighted with rectangular polycarbonate plates.
The removal of tide lines on the print verso was checked under UVA. The left image shows the intensive fluorescence of the tide line before poulticing; the right image shows the same area after poulticing.

MOUNTING AND FRAMING
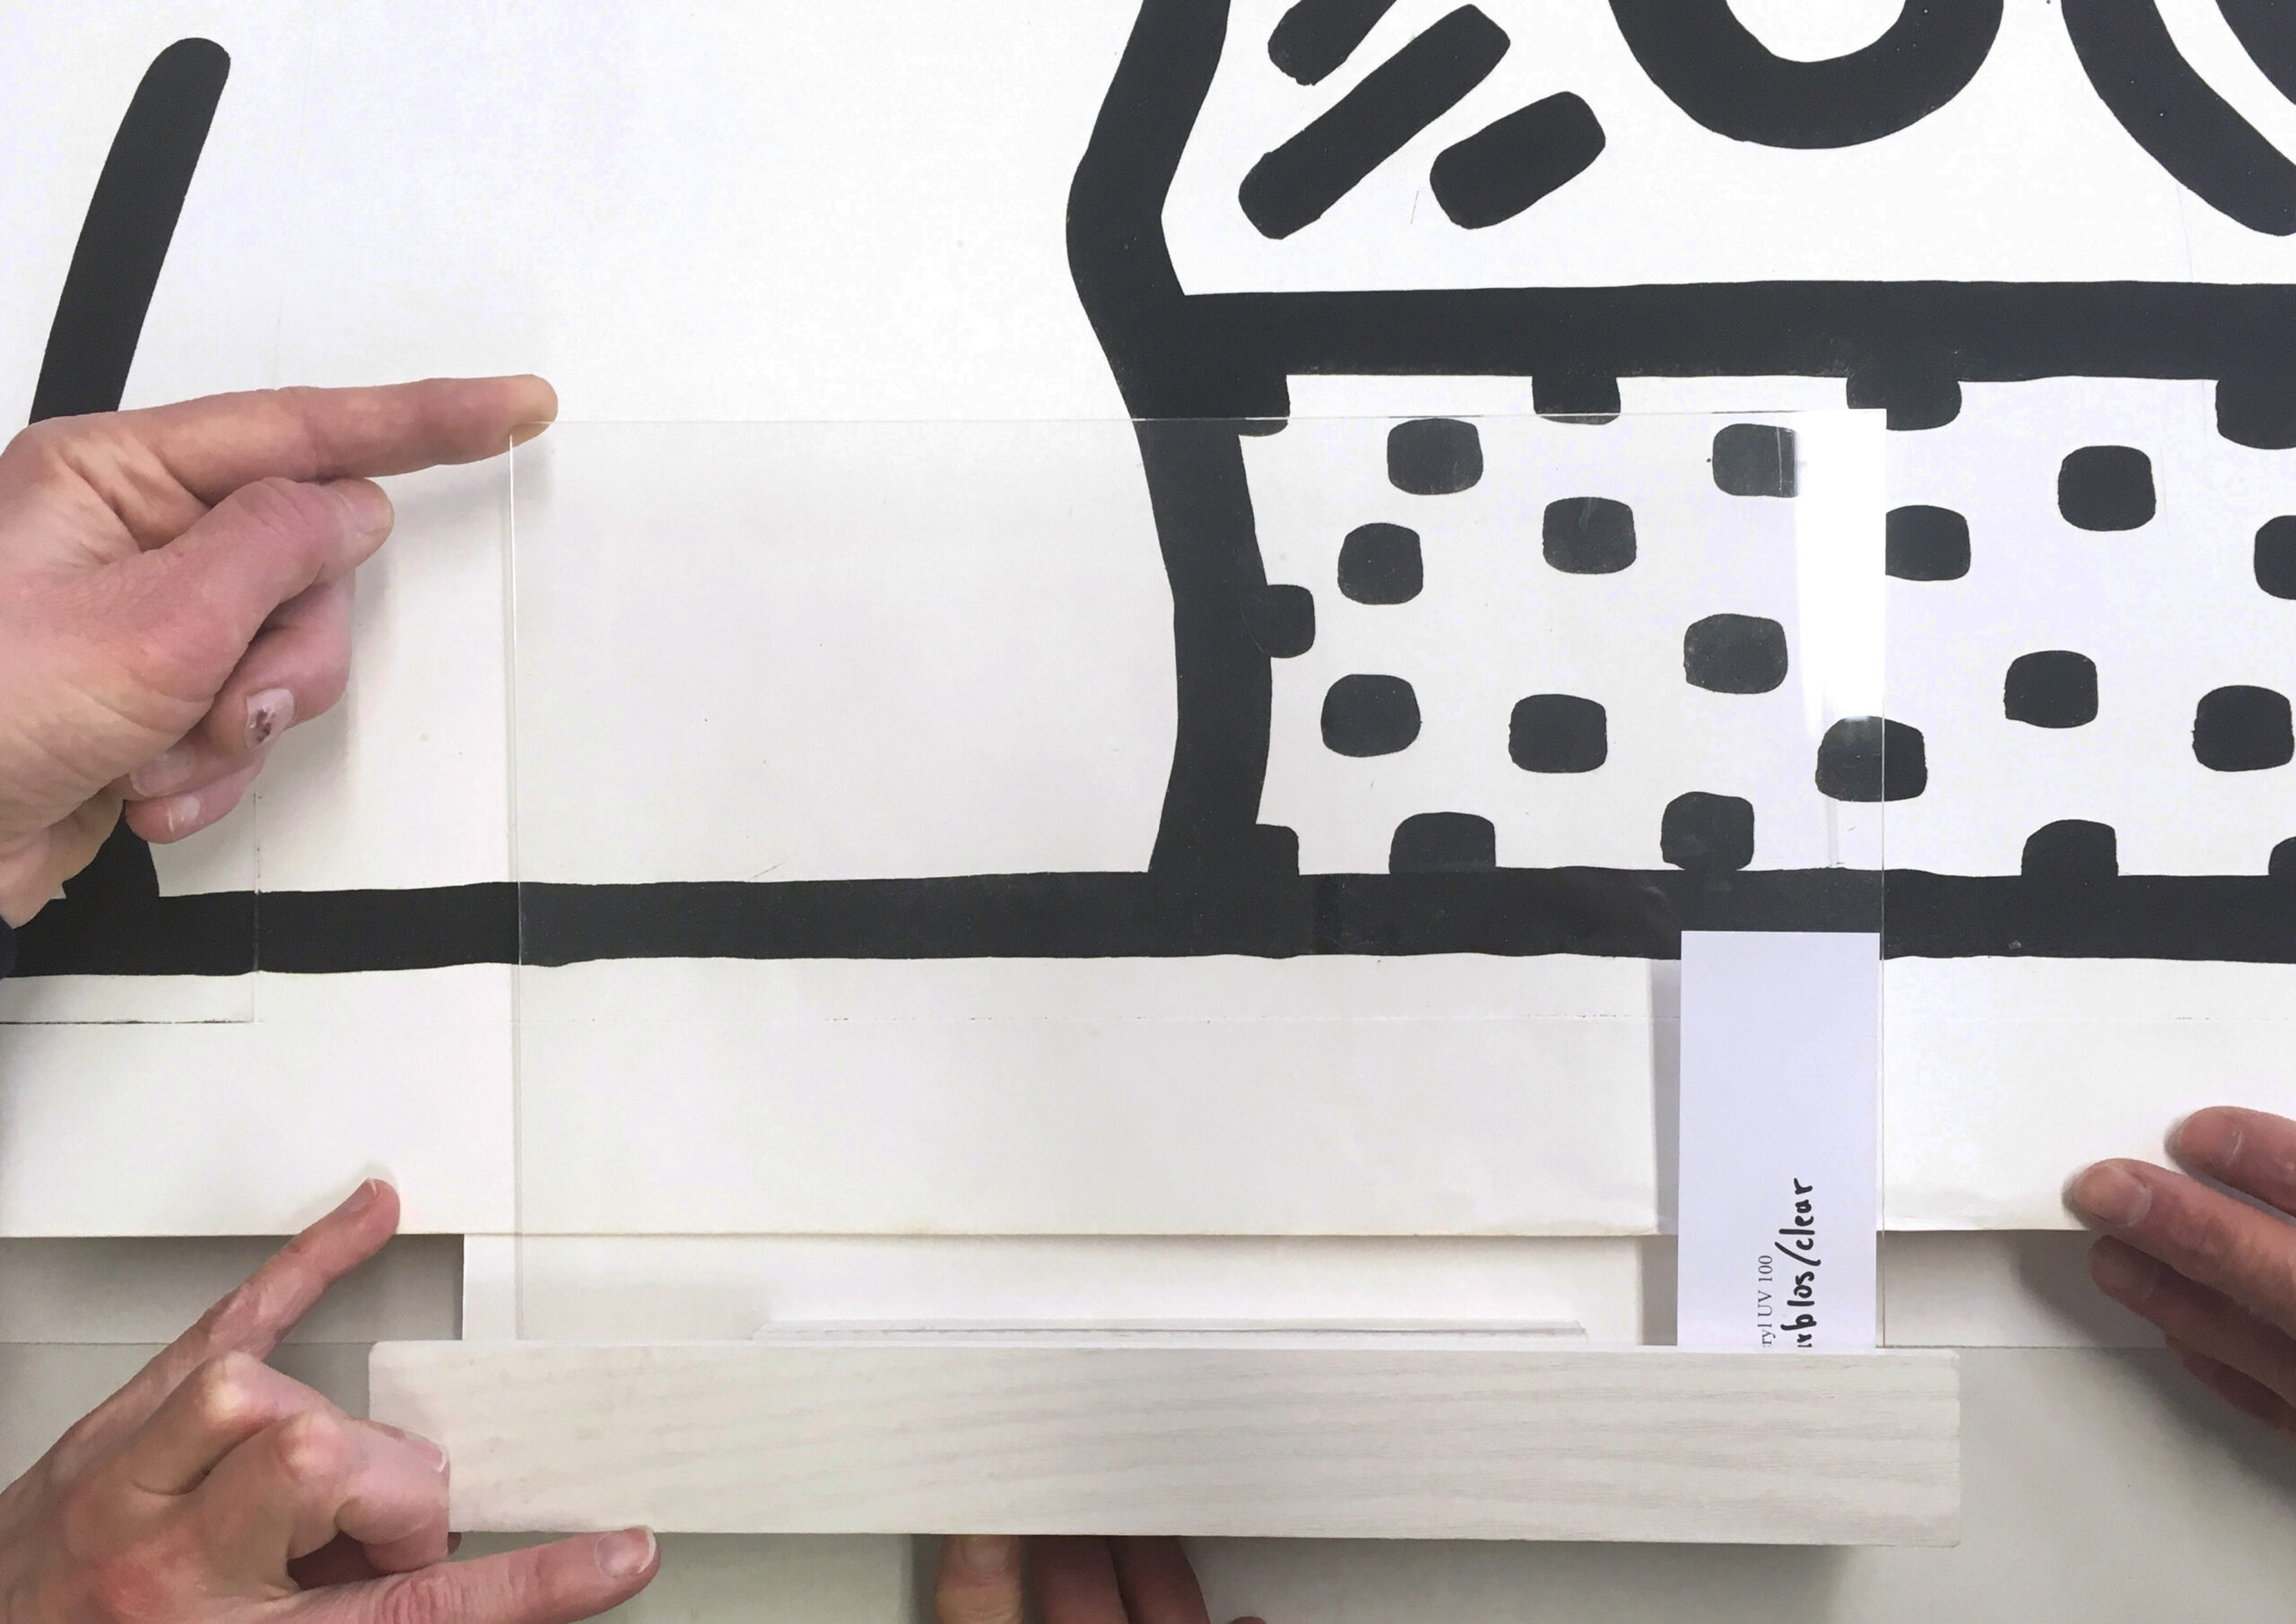
In this photo, details of the frame design are discussed using a sample of the molding and glazing. The new, custom-designed frame was constructed by the framing studio Fischinger in Stuttgart. The frame style was chosen in collaboration with the owner who was also sent several photographs including the one seen here.
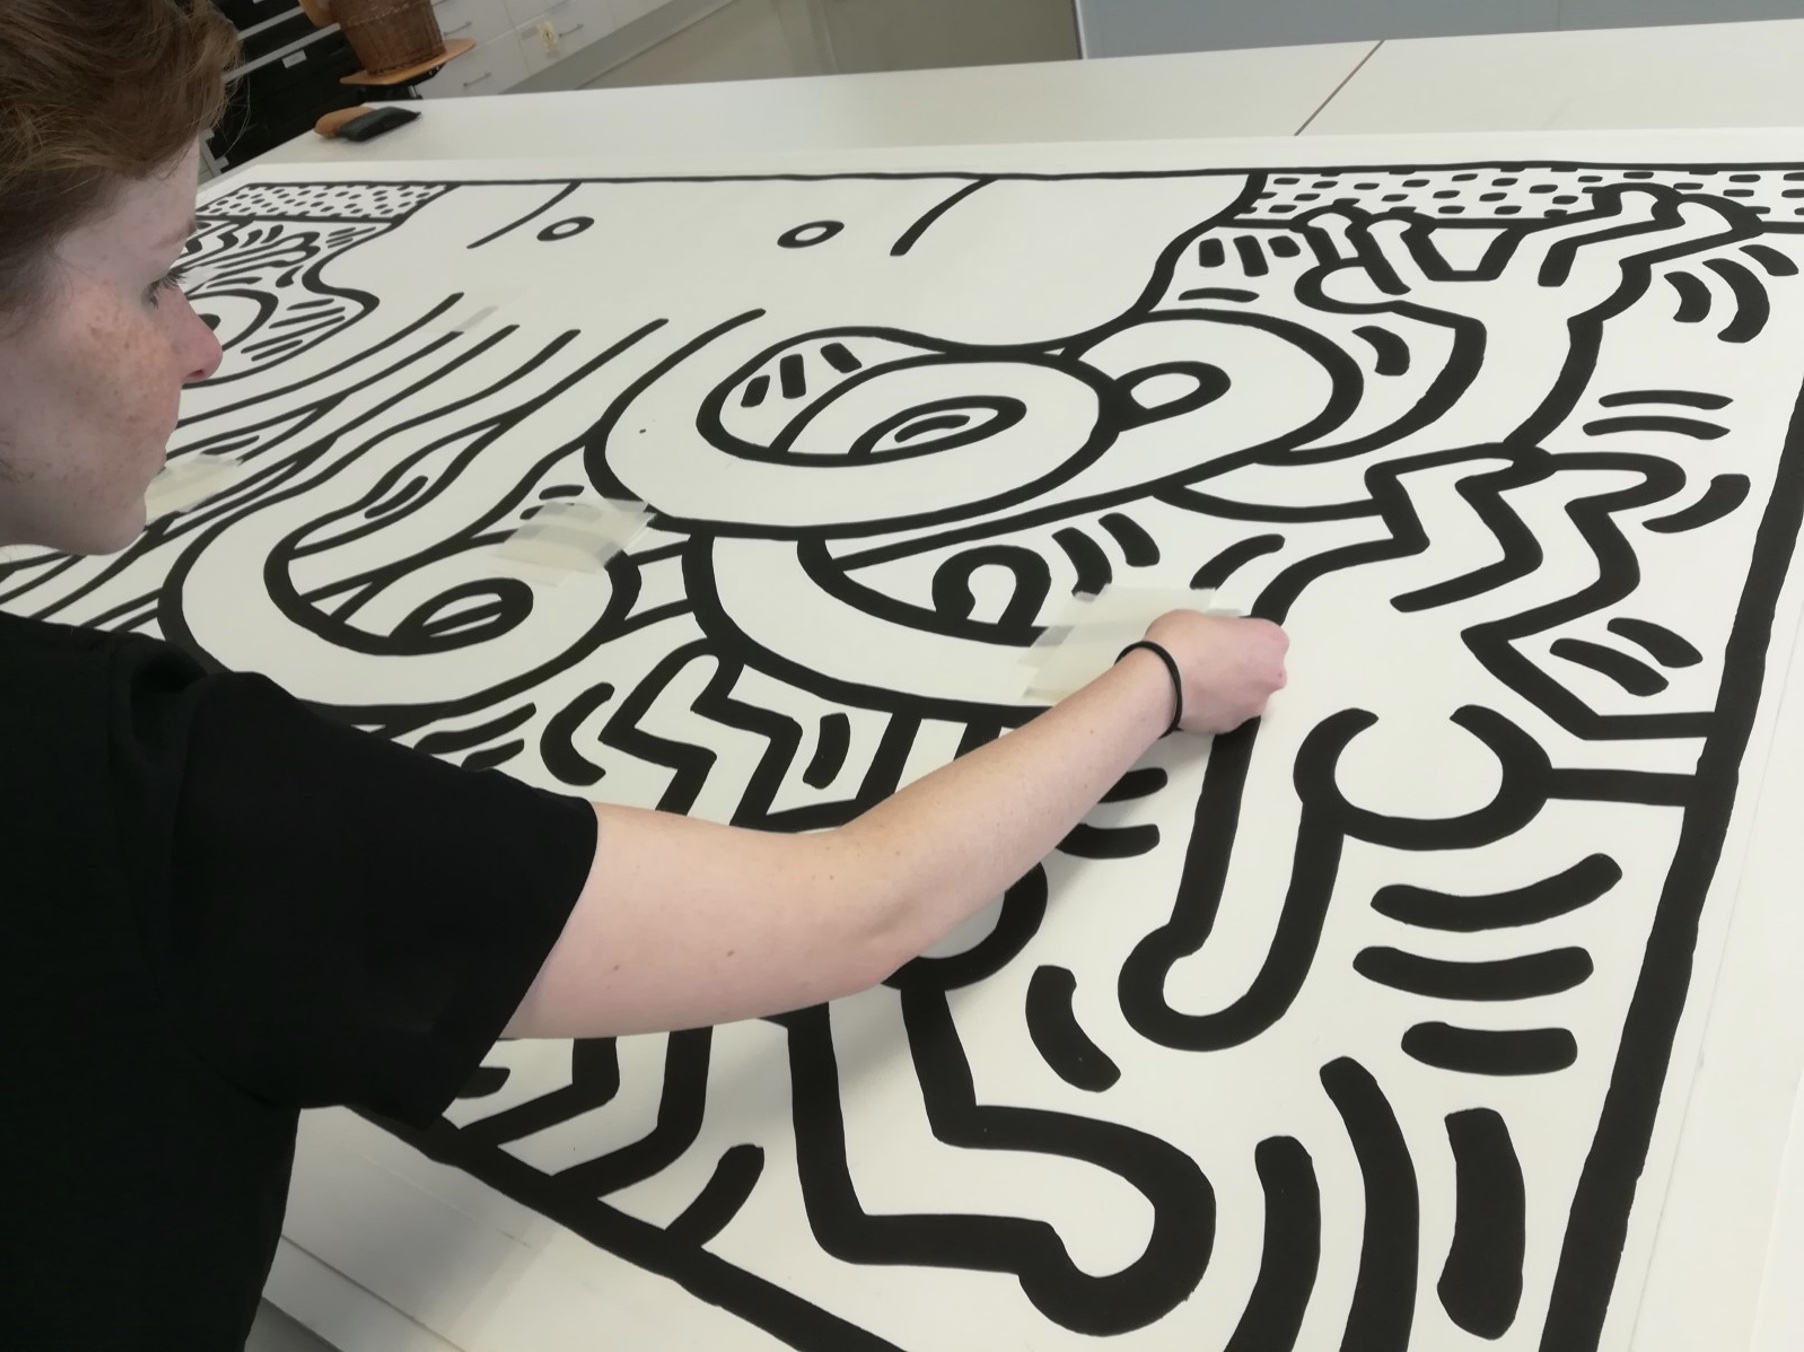
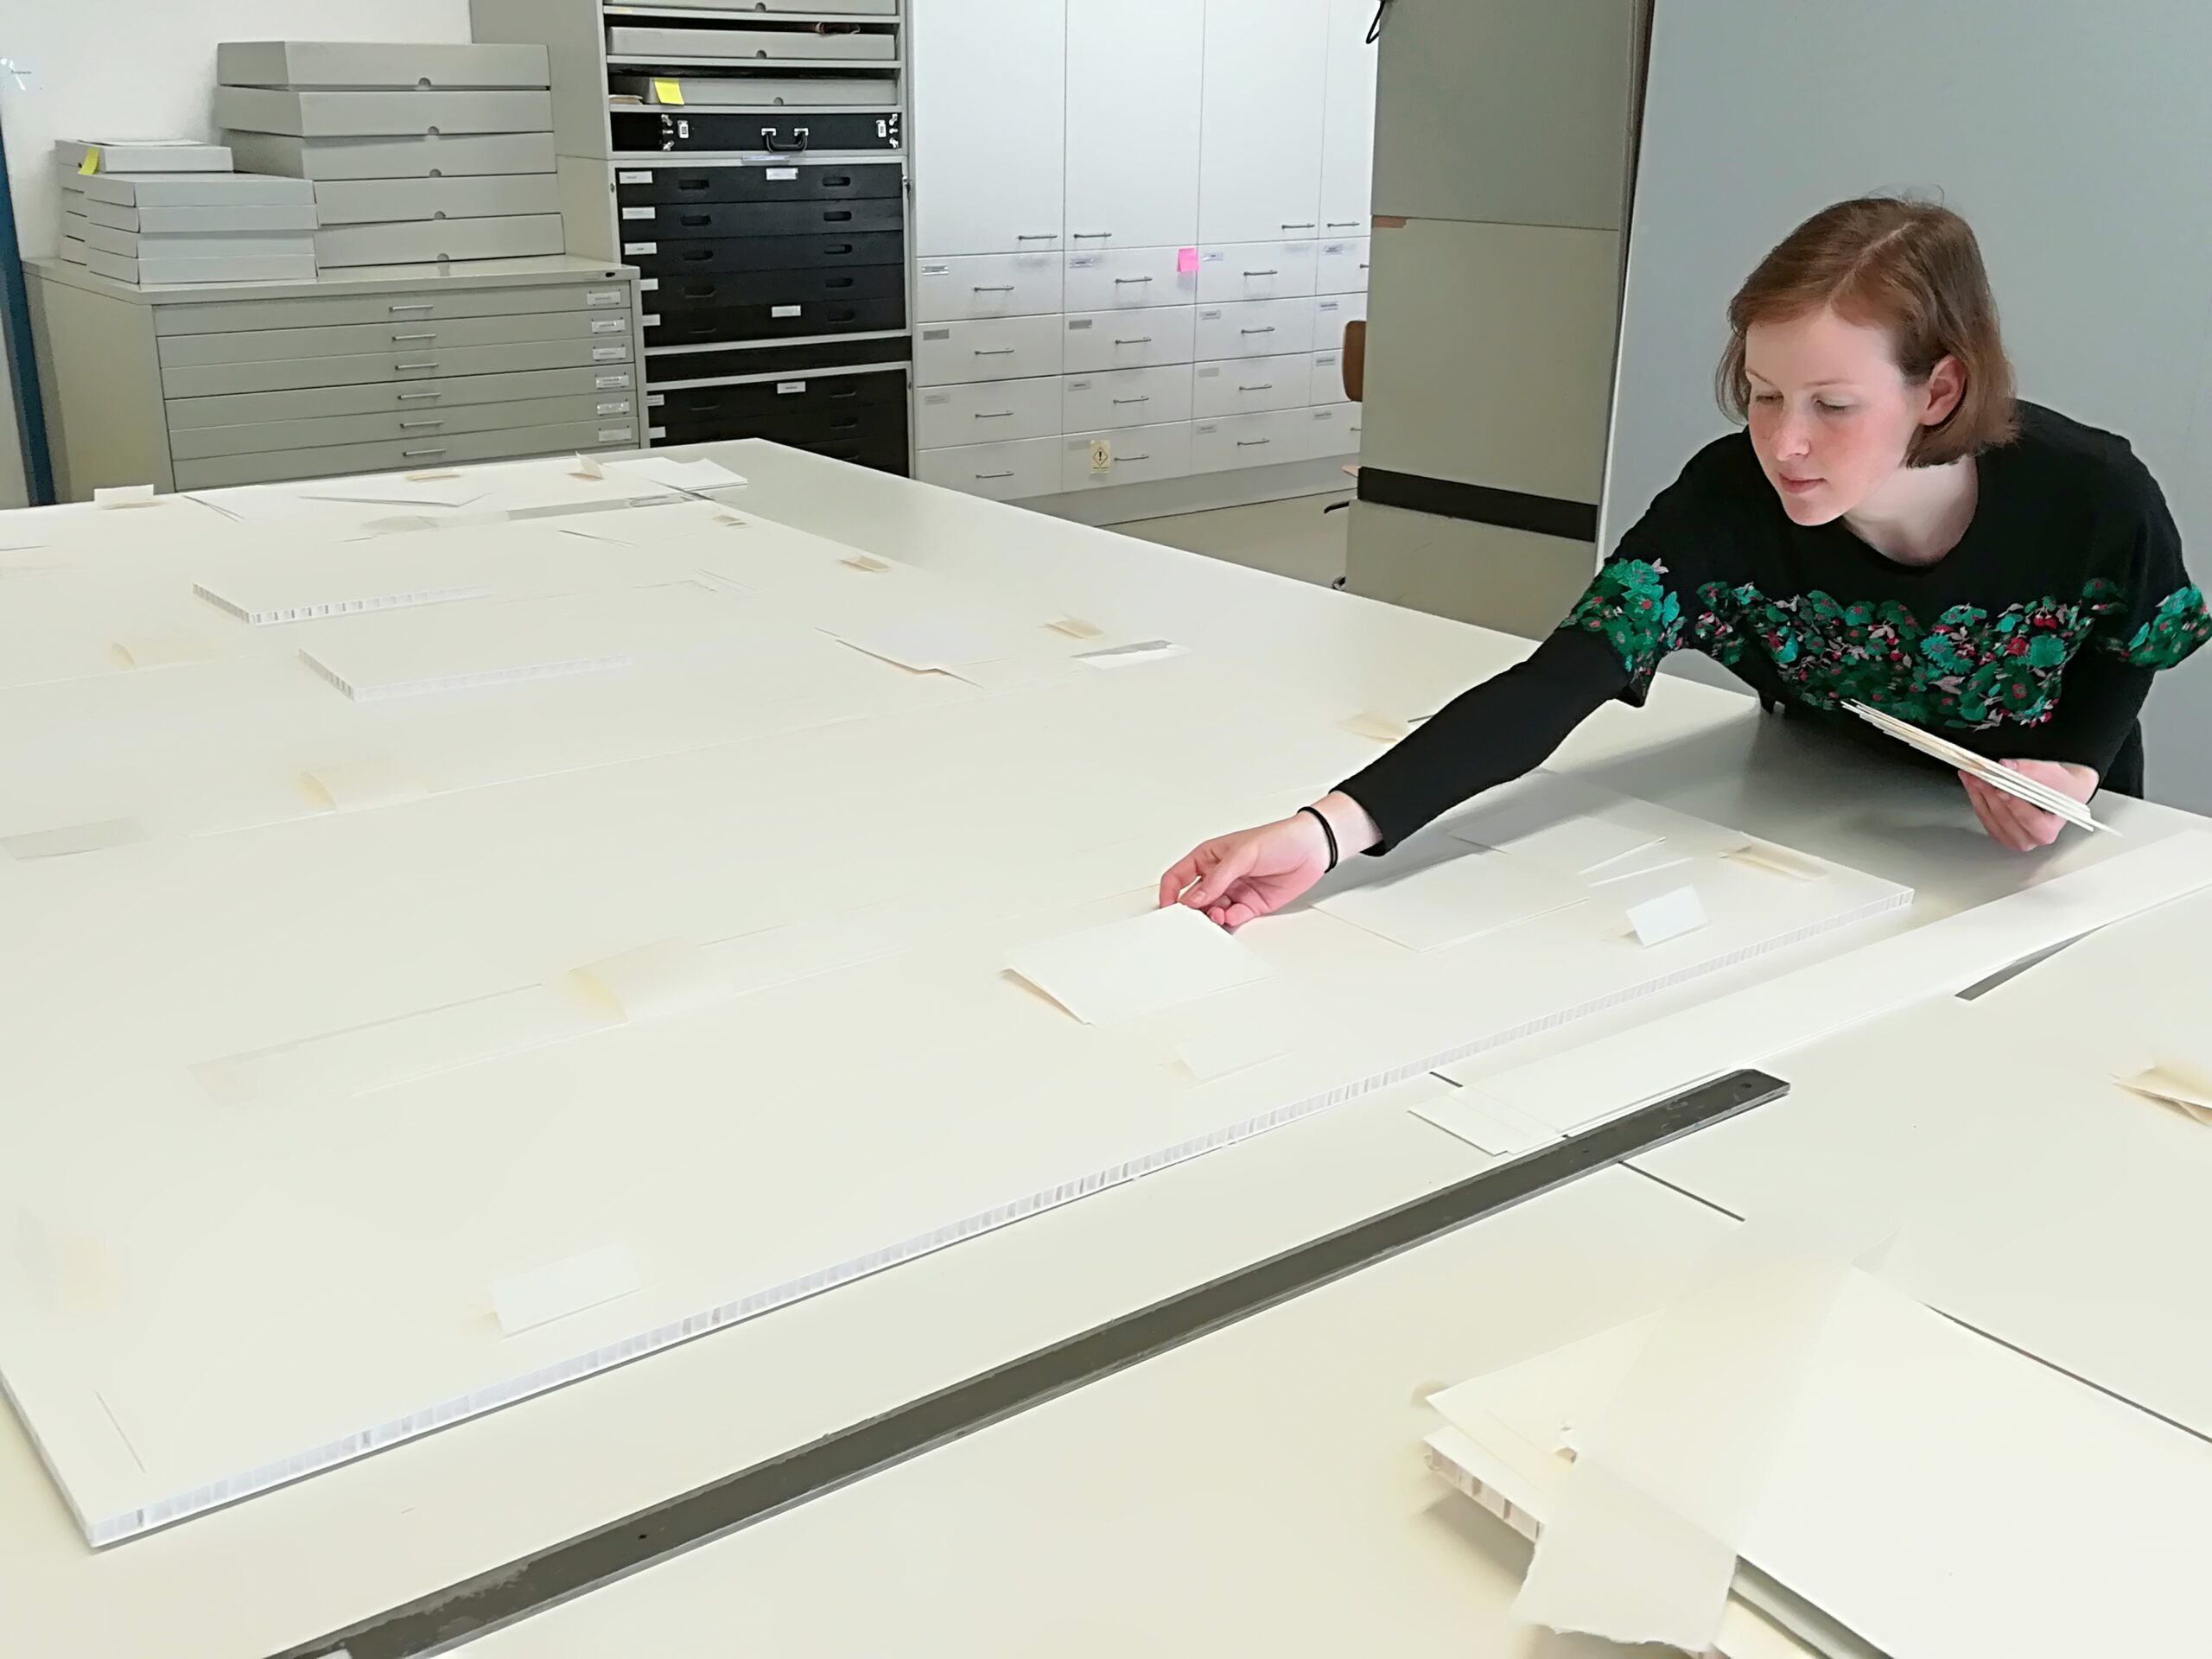
Mounting the large print involved extensive planning. Different hinging techniques had to be combined to stabilize the print for vertical display. In the photo, the future placement of several Japanese paper hinges is checked by placing them loosely on the print.
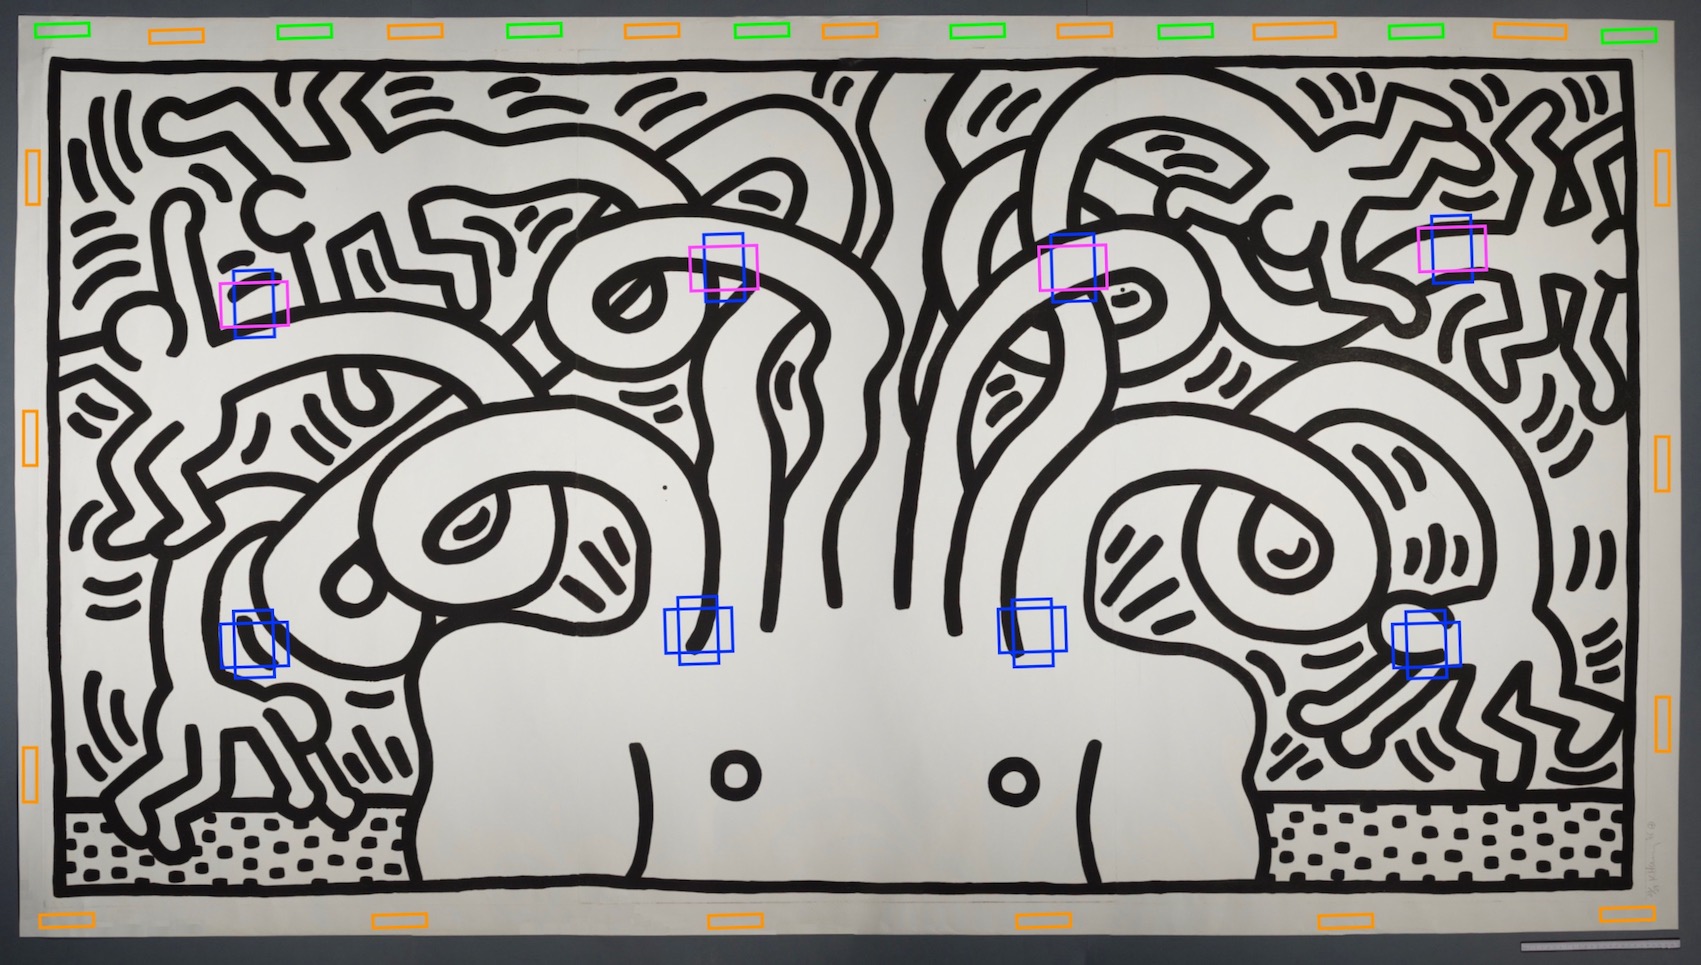
Seen here is the placement of the hinges along the edges of the print and in its center. Half of the upper hinges as well as the cross hinges in the middle were slotted through the mounting board. The cross hinges enhanced the stability of the mounting across the plane of the print. They were adjusted with an appropriate tension that allows slight movement of the paper. The remaining hinges along the edges were done as V-hinges.
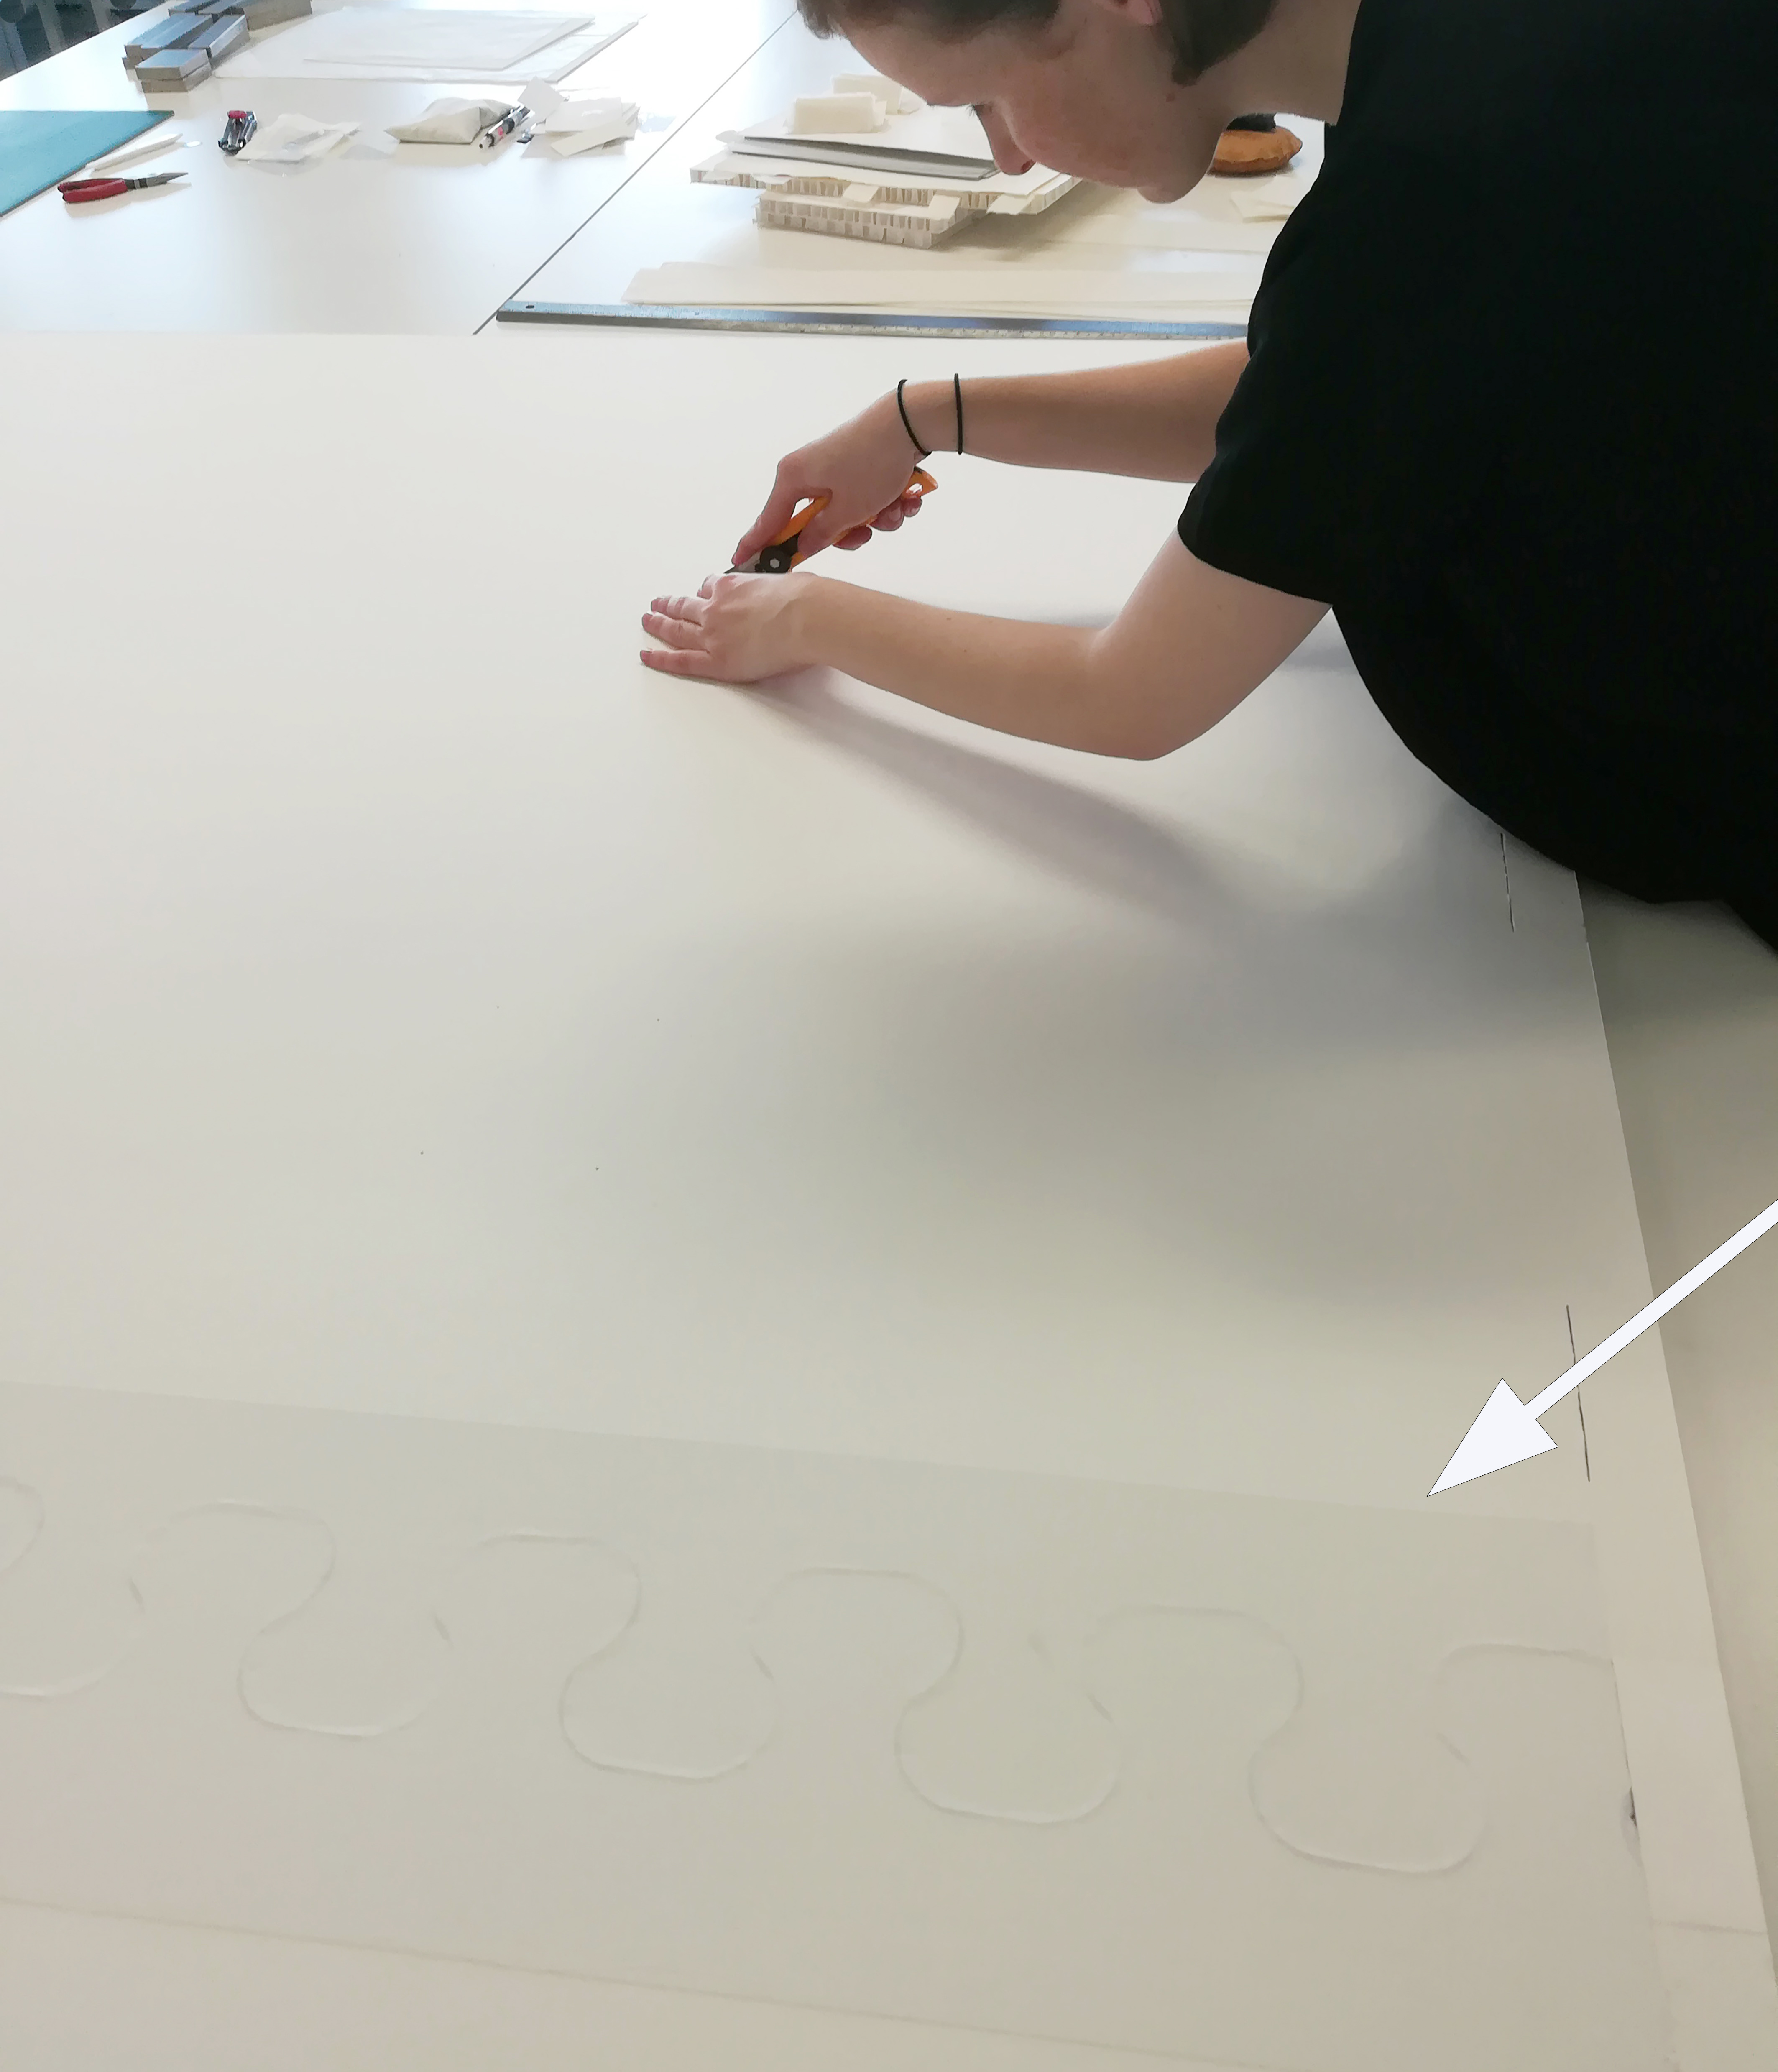
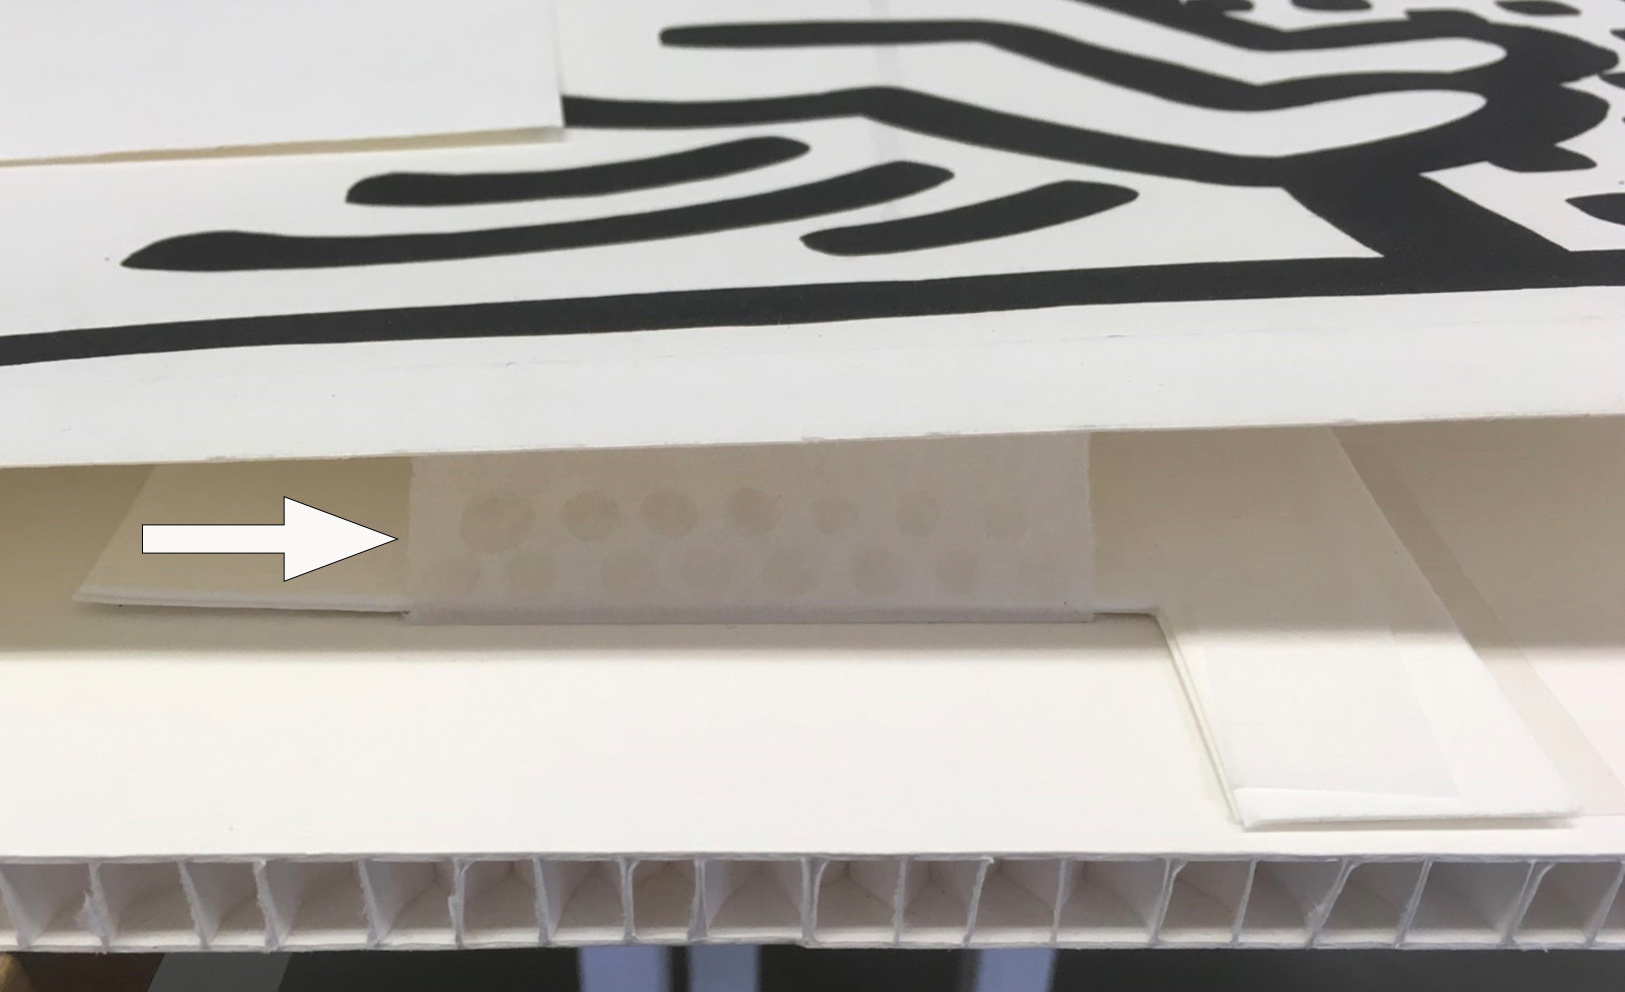
For the mounting support, we chose a honeycomb board (12 mm thickness) from KLUG-CONSERVATION. To achieve the needed dimension, two panels were joined along their puzzle-shaped edges with a wide, gummed cloth strip (arrow).
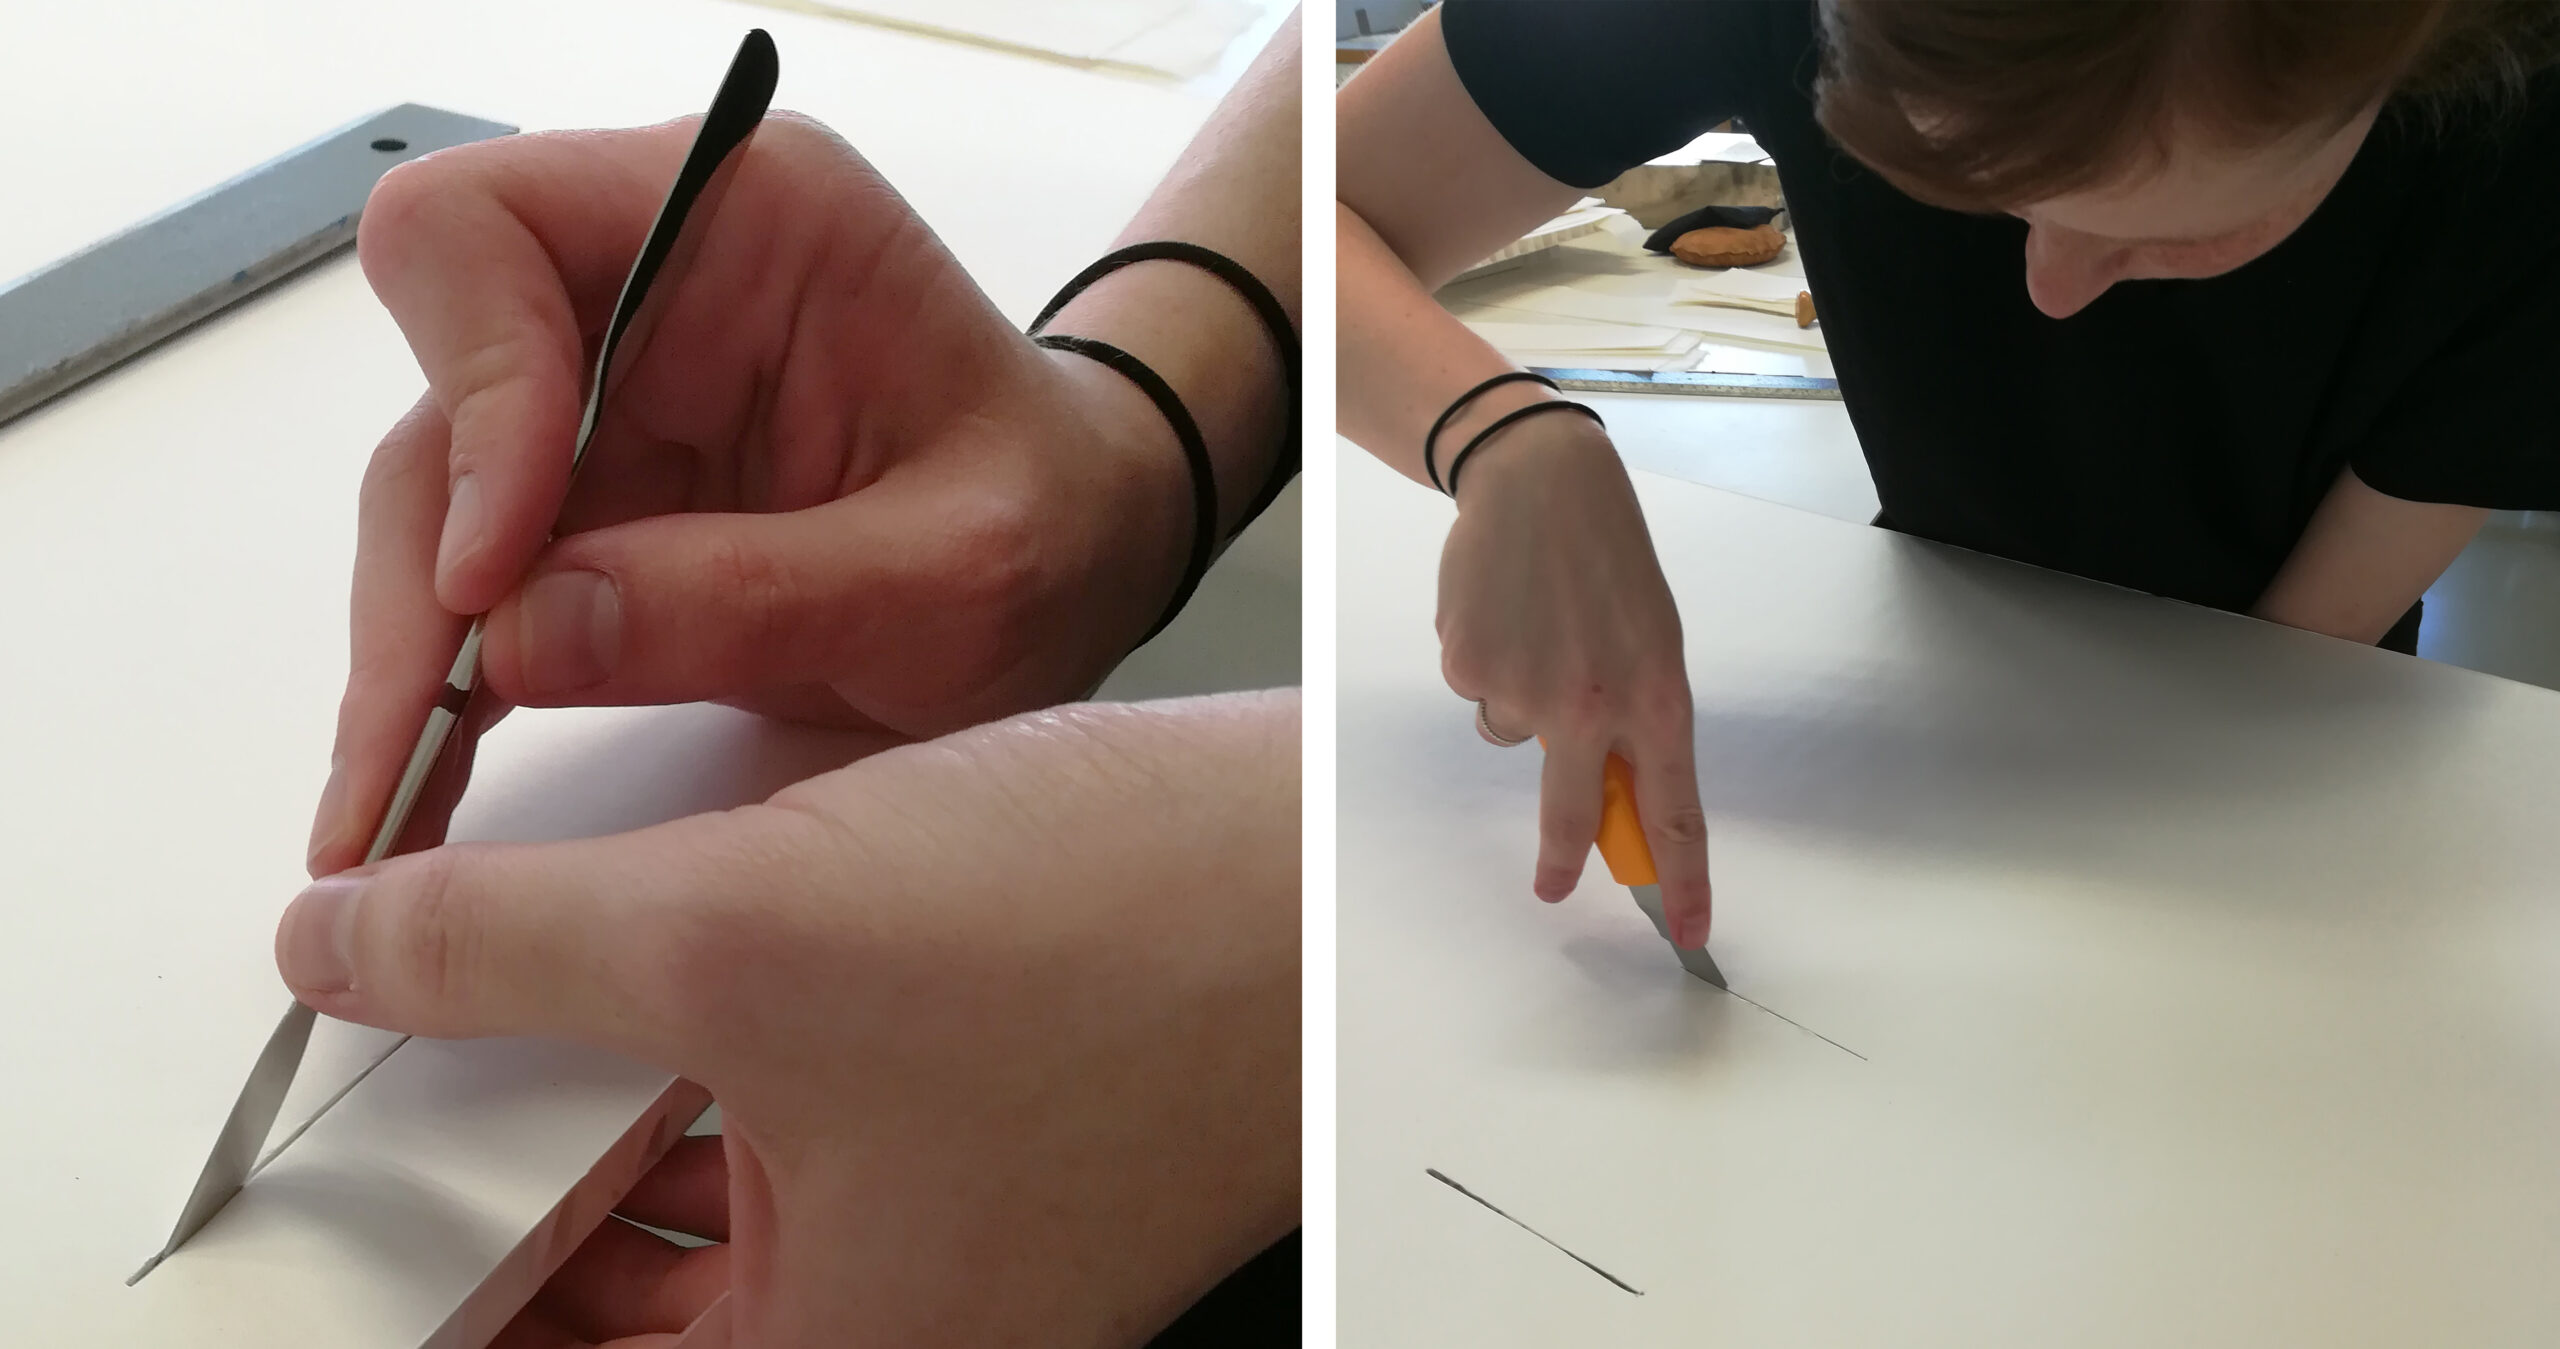
For the slotted hinges, the honeycomb panel was slit in strategic positions. Single slits were made along the panel’s edges (left photo), and double slits were made in the panel’s center (right photo).
Mounting the print with several cross hinges attached in center positions needed to be planned strategically ahead of time because certain areas couldn’t be reached once the edges of the print were adhered.
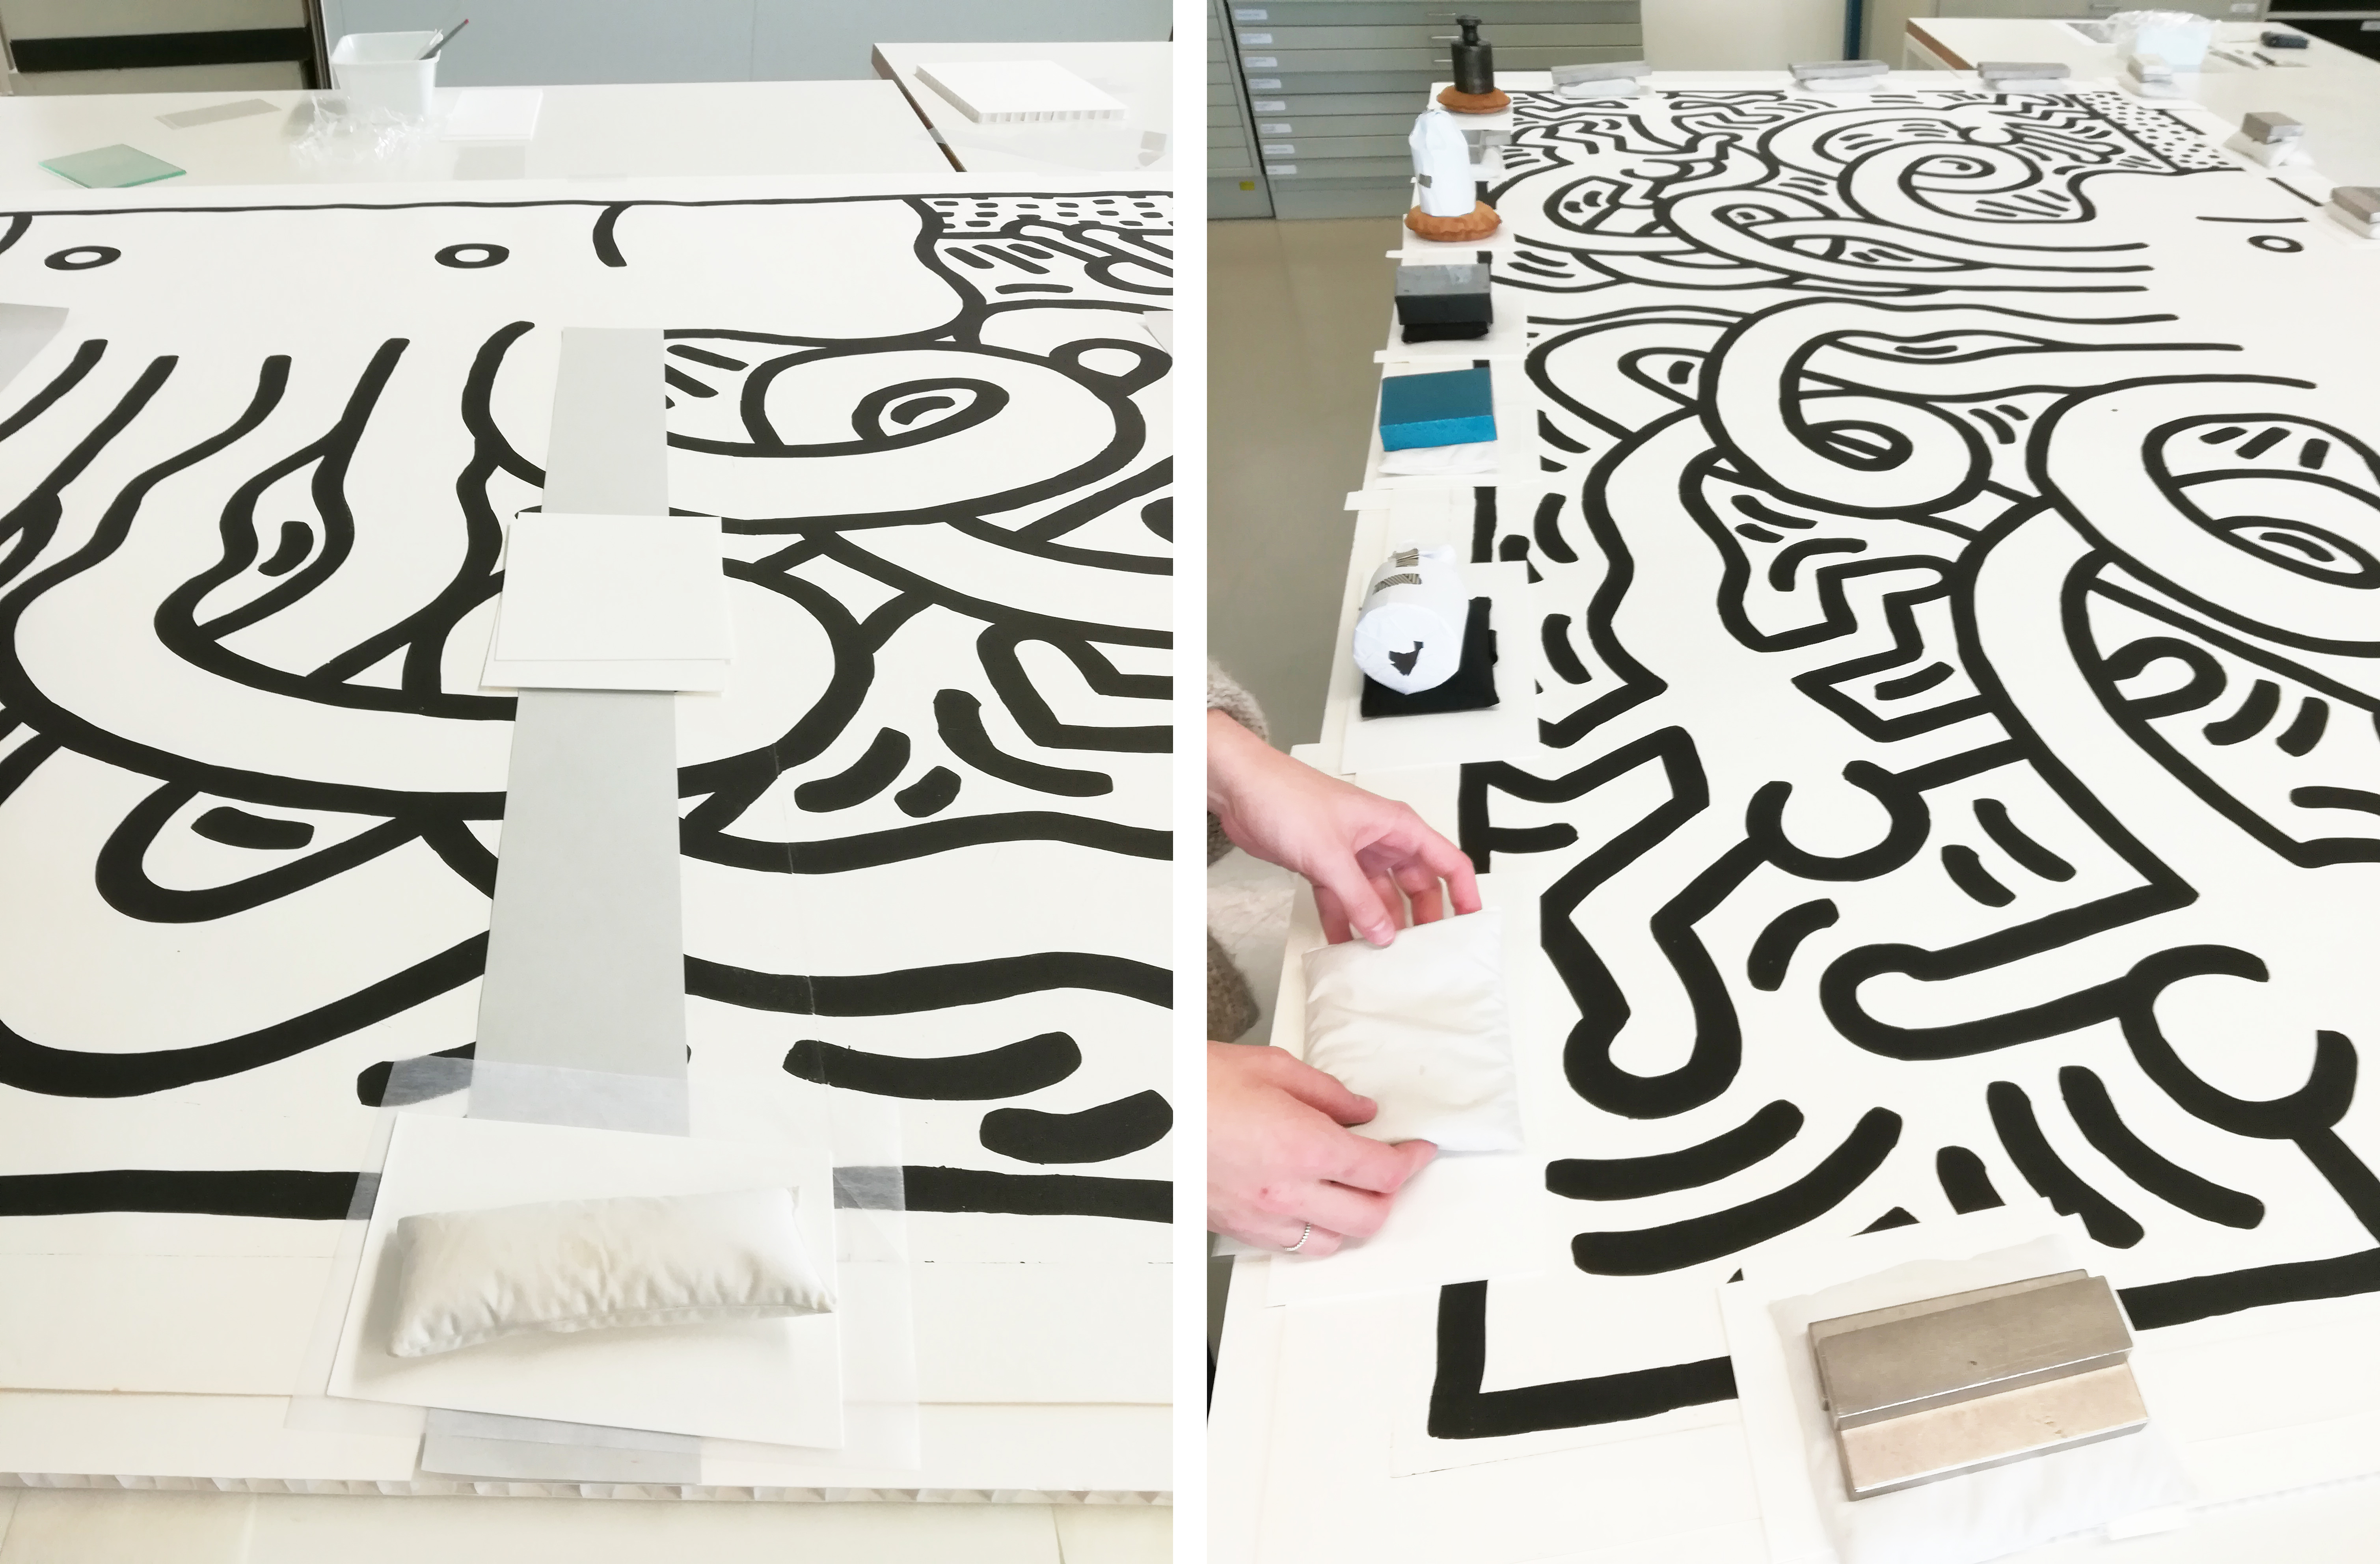
For preparing the attachment of the cross hinges in the center of the print, strips of various drying materials were placed below the part of the cross hinge (Japanese paper) already slotted through the board (white arrow). The strips were needed to dry the hinges once they were adhered with wheat starch paste to the print positioned on the board and were then to be pulled out towards the bottom edge of the print (red arrows). The strips consisted of (bottom to top) polyester film, blotters, and non-woven polyester fabric.

The V-hinges that were already adhered to the honeycomb board were – in the second step – adhered to the print using a macro-dot adhesive application (a variation of micro-dots). This minimized the risk of large moist areas and provided sufficient adhesion. The photo shows the hinge with the freshly applied macro-dot wheat starch paste (arrow) just before adhesion to the print.
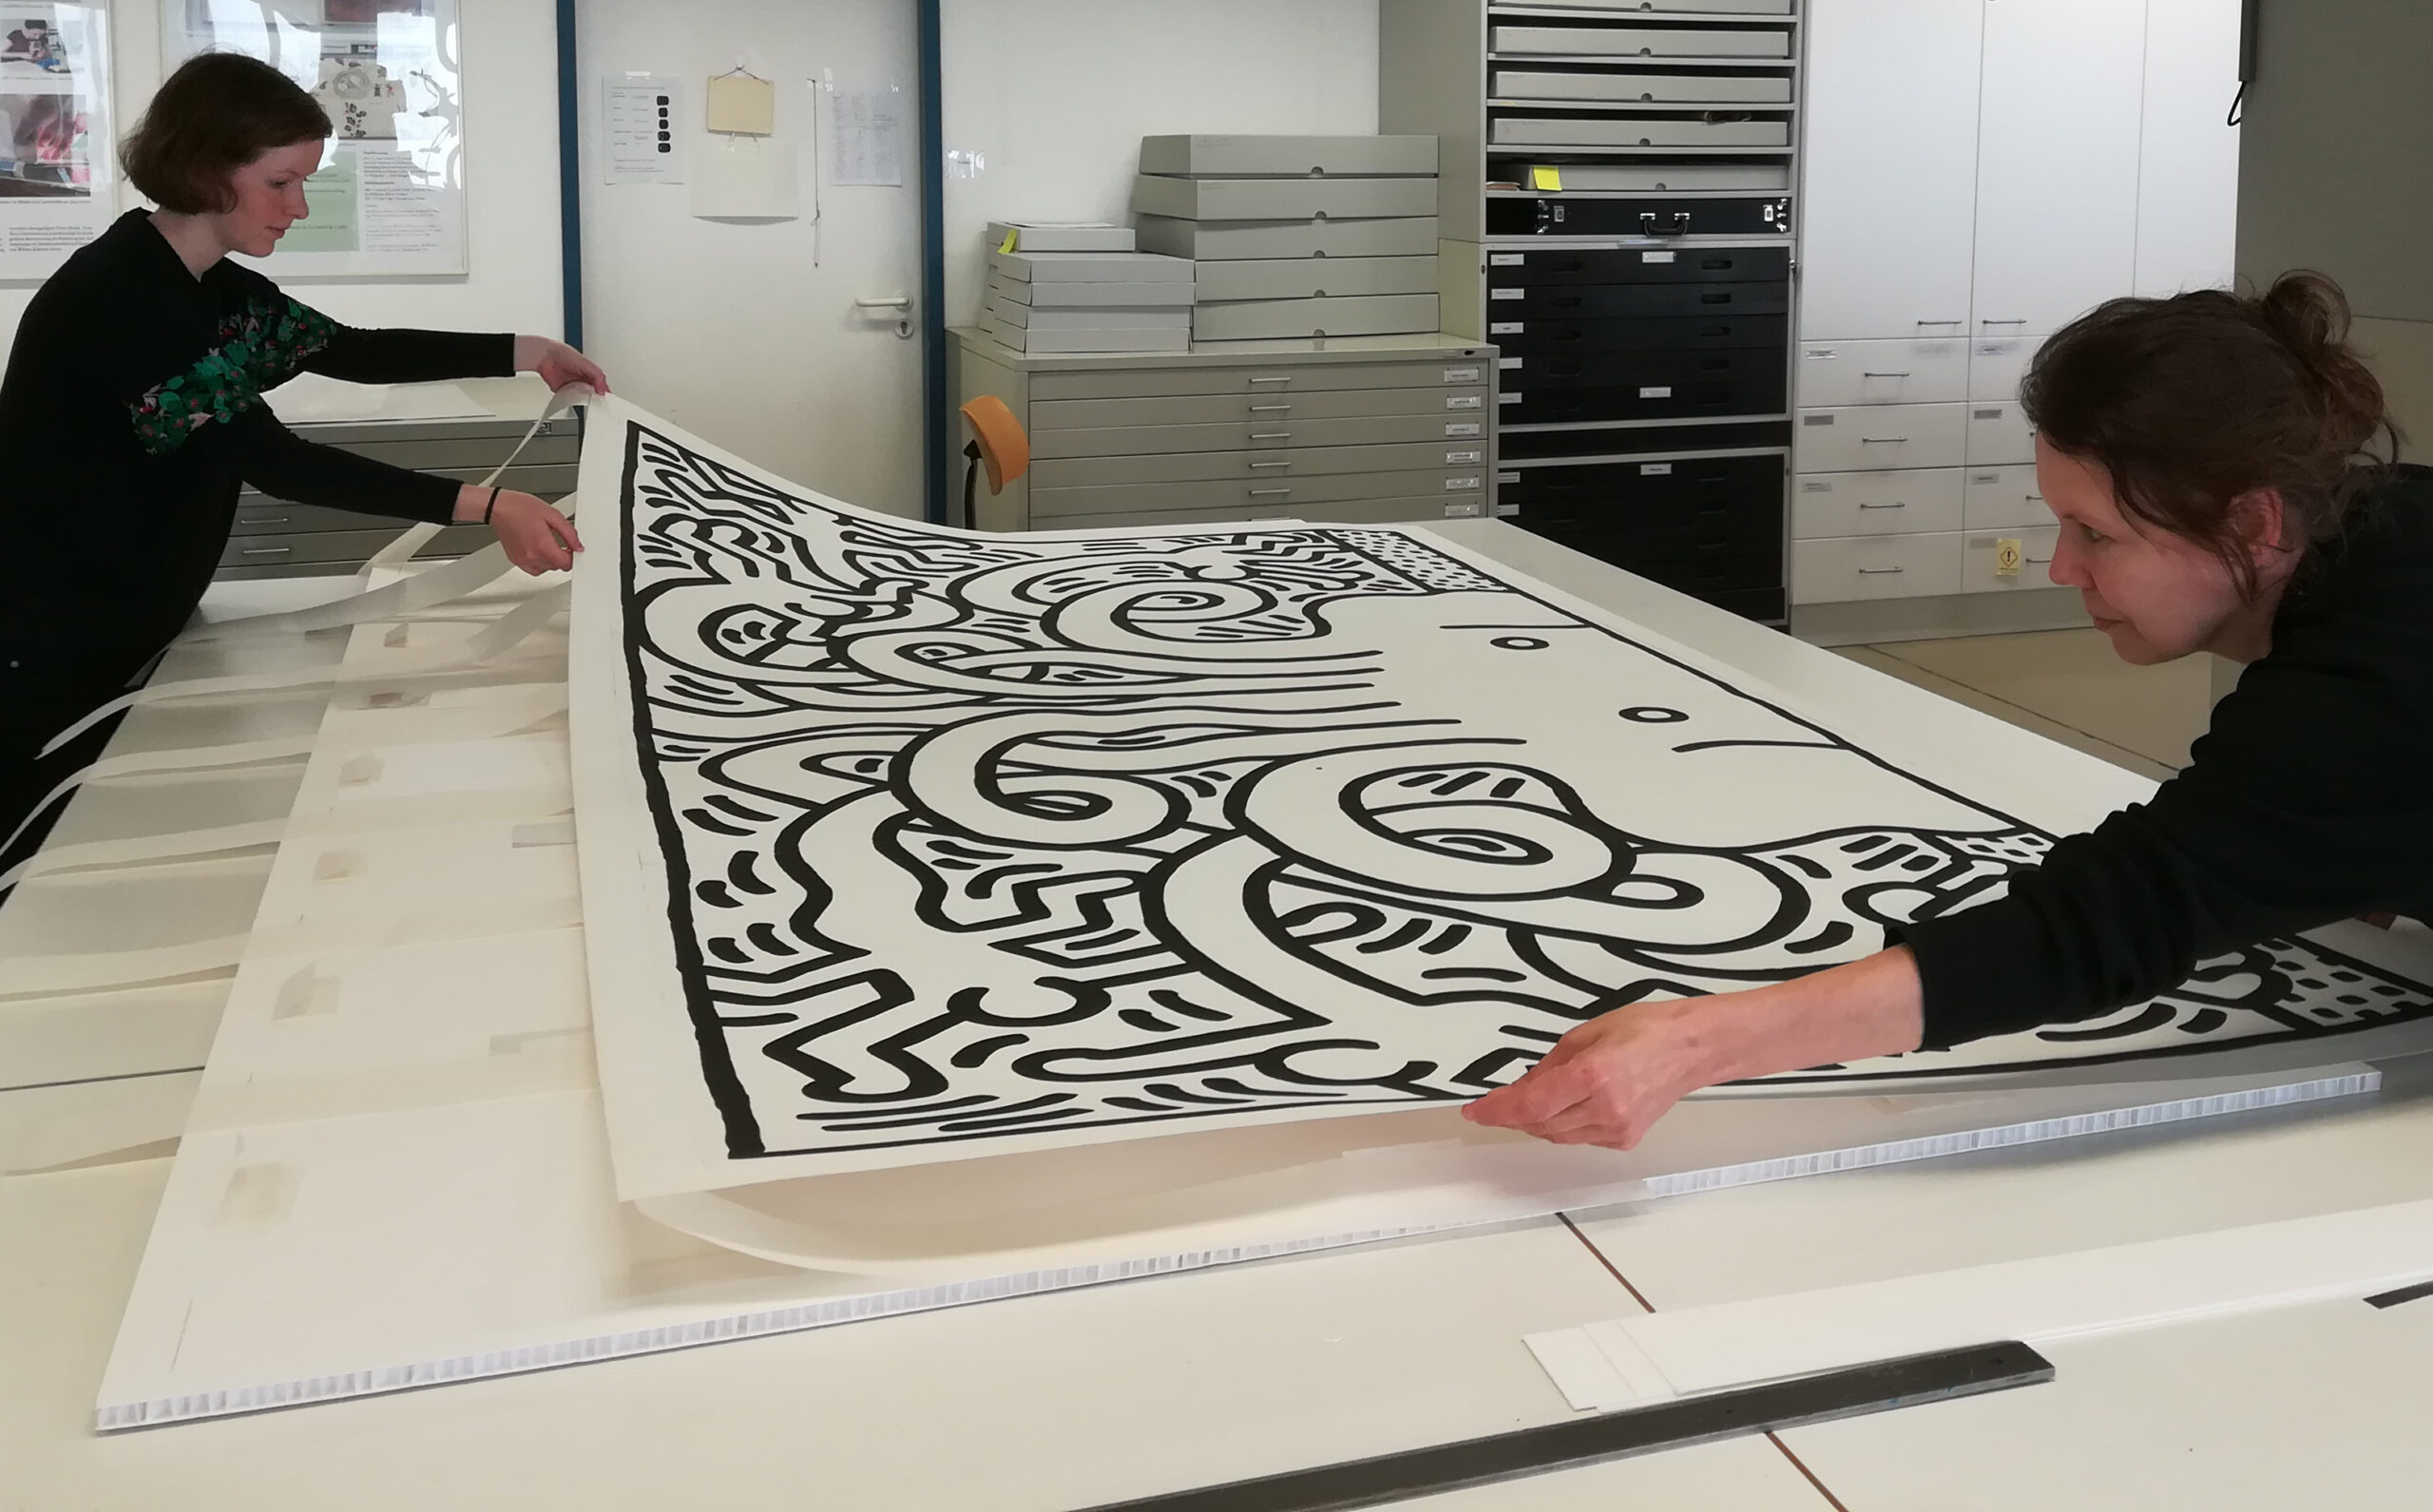
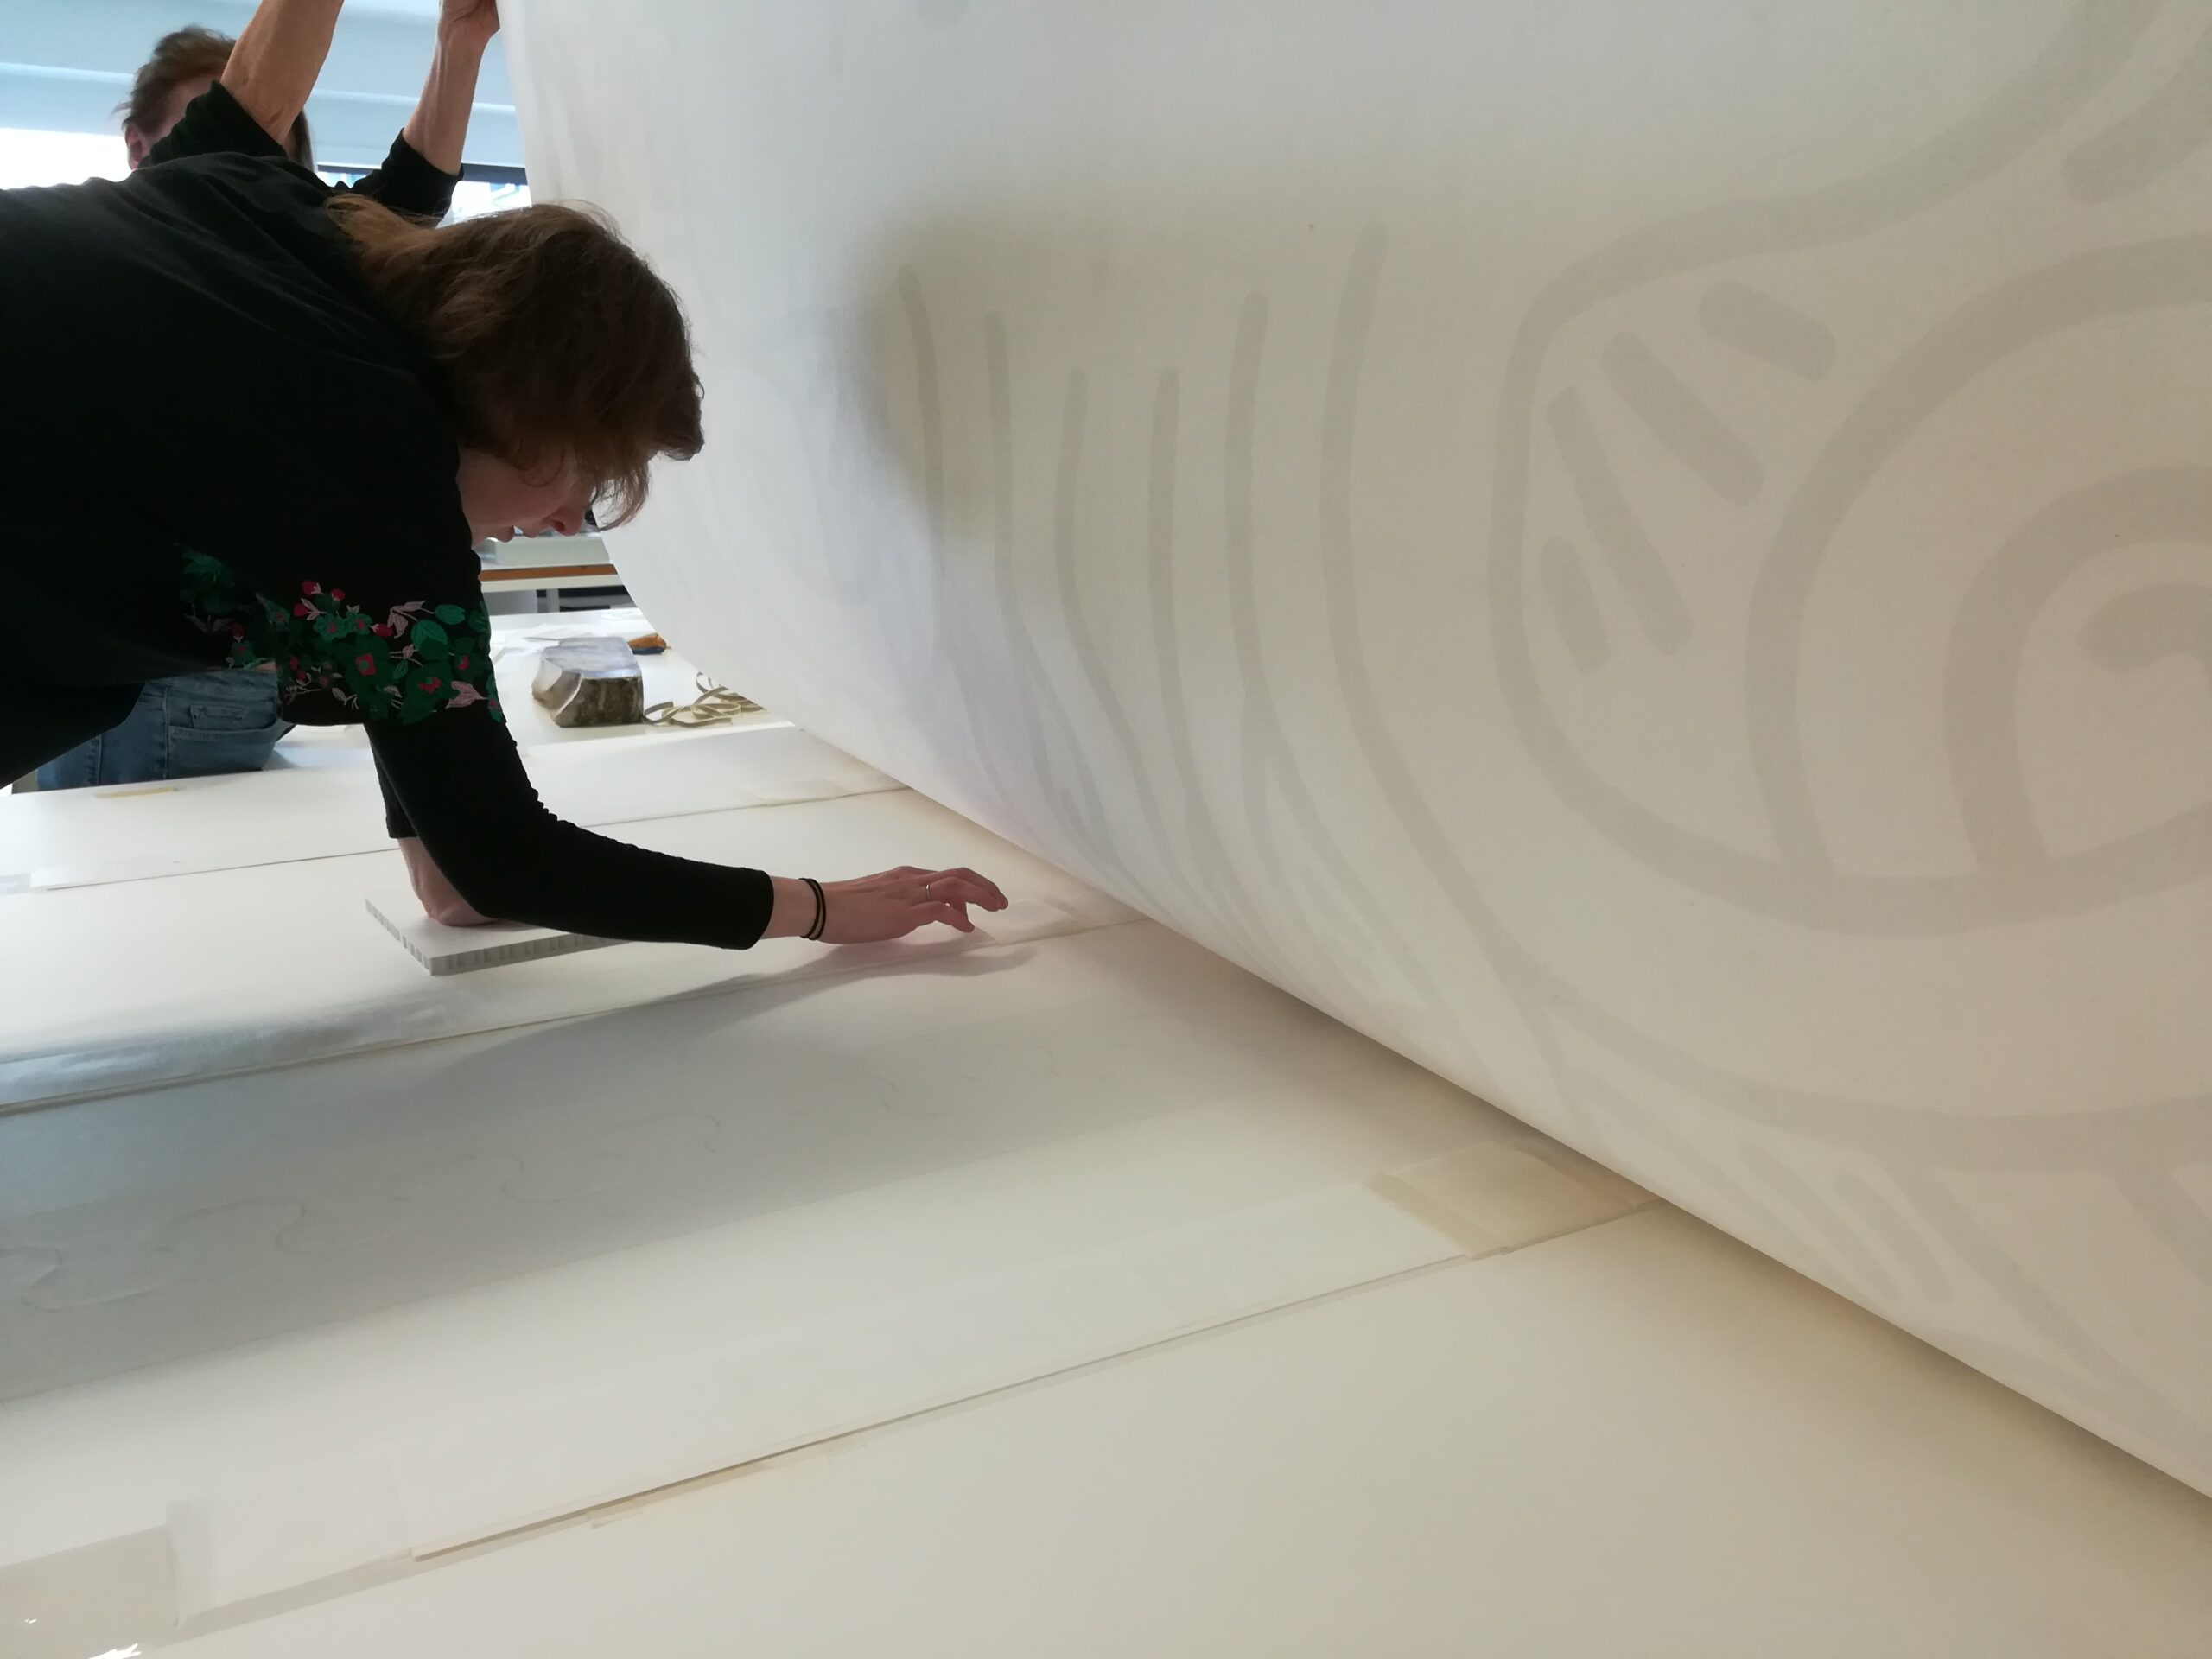
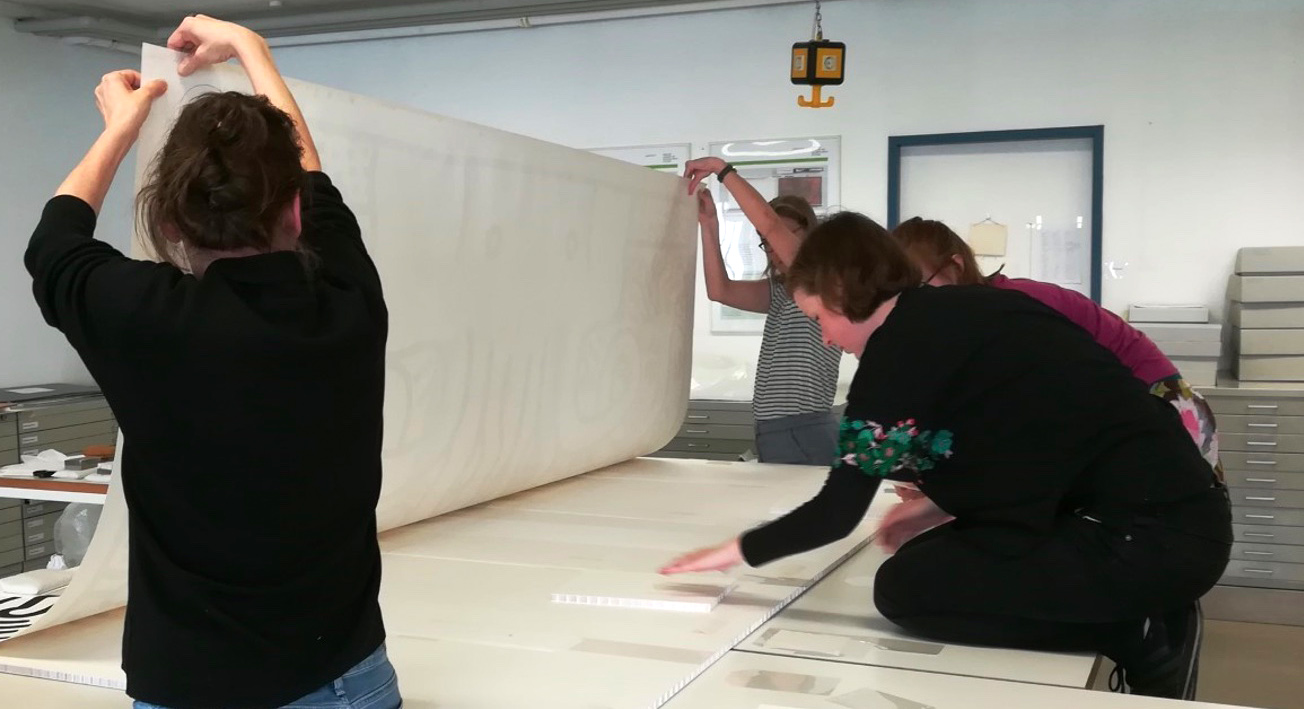
Mounting the hinges in the center of the print required a team for lifting the lower part of the print and accessing the cross-hinges already positioned on the mounting board.

For drying, the hinge areas were covered on the recto of the print with non-woven polyester and blotting paper. Weights were placed on top.
The slotted hinge paper strips adhered along the top of the print were gently nudged on the verso of the mounting board to adjust the position of the print. This process is seen in the photo. The slotted hinge papers were then straightened and adhered to the board at their lower edge. The same adjustment was carried out with the slotted hinges in the center of the print.

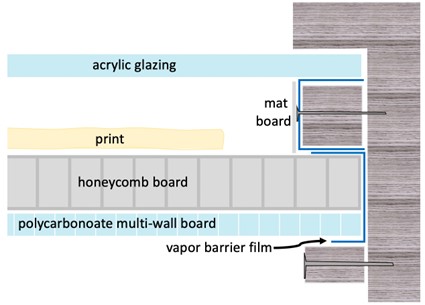
This photo shows the structure of the micro-climate frame in cross section. The print, mounted on honeycomb board, is spaced at a distance from the acrylic glazing with a wooden spacer. The spacer is covered with a vapor barrier film (Marvelseal 360®, a composite aluminum film) ironed onto the wood to protect the frame interior from any volatile organic compounds off-gassing from the wood. The spacer is covered with matboard along the side visible in the frame. The vapor barrier film also wraps around the mounting board and is adhered to the polycarbonate multi-wall board on the back of the frame.
A team was needed to secure the print in its frame. In the photo, the back of the mounting board is seen, the bottom edge is already settled into the frame rabbet. The vapor barrier film that wraps around the back edge can be seen along the bottom edge.

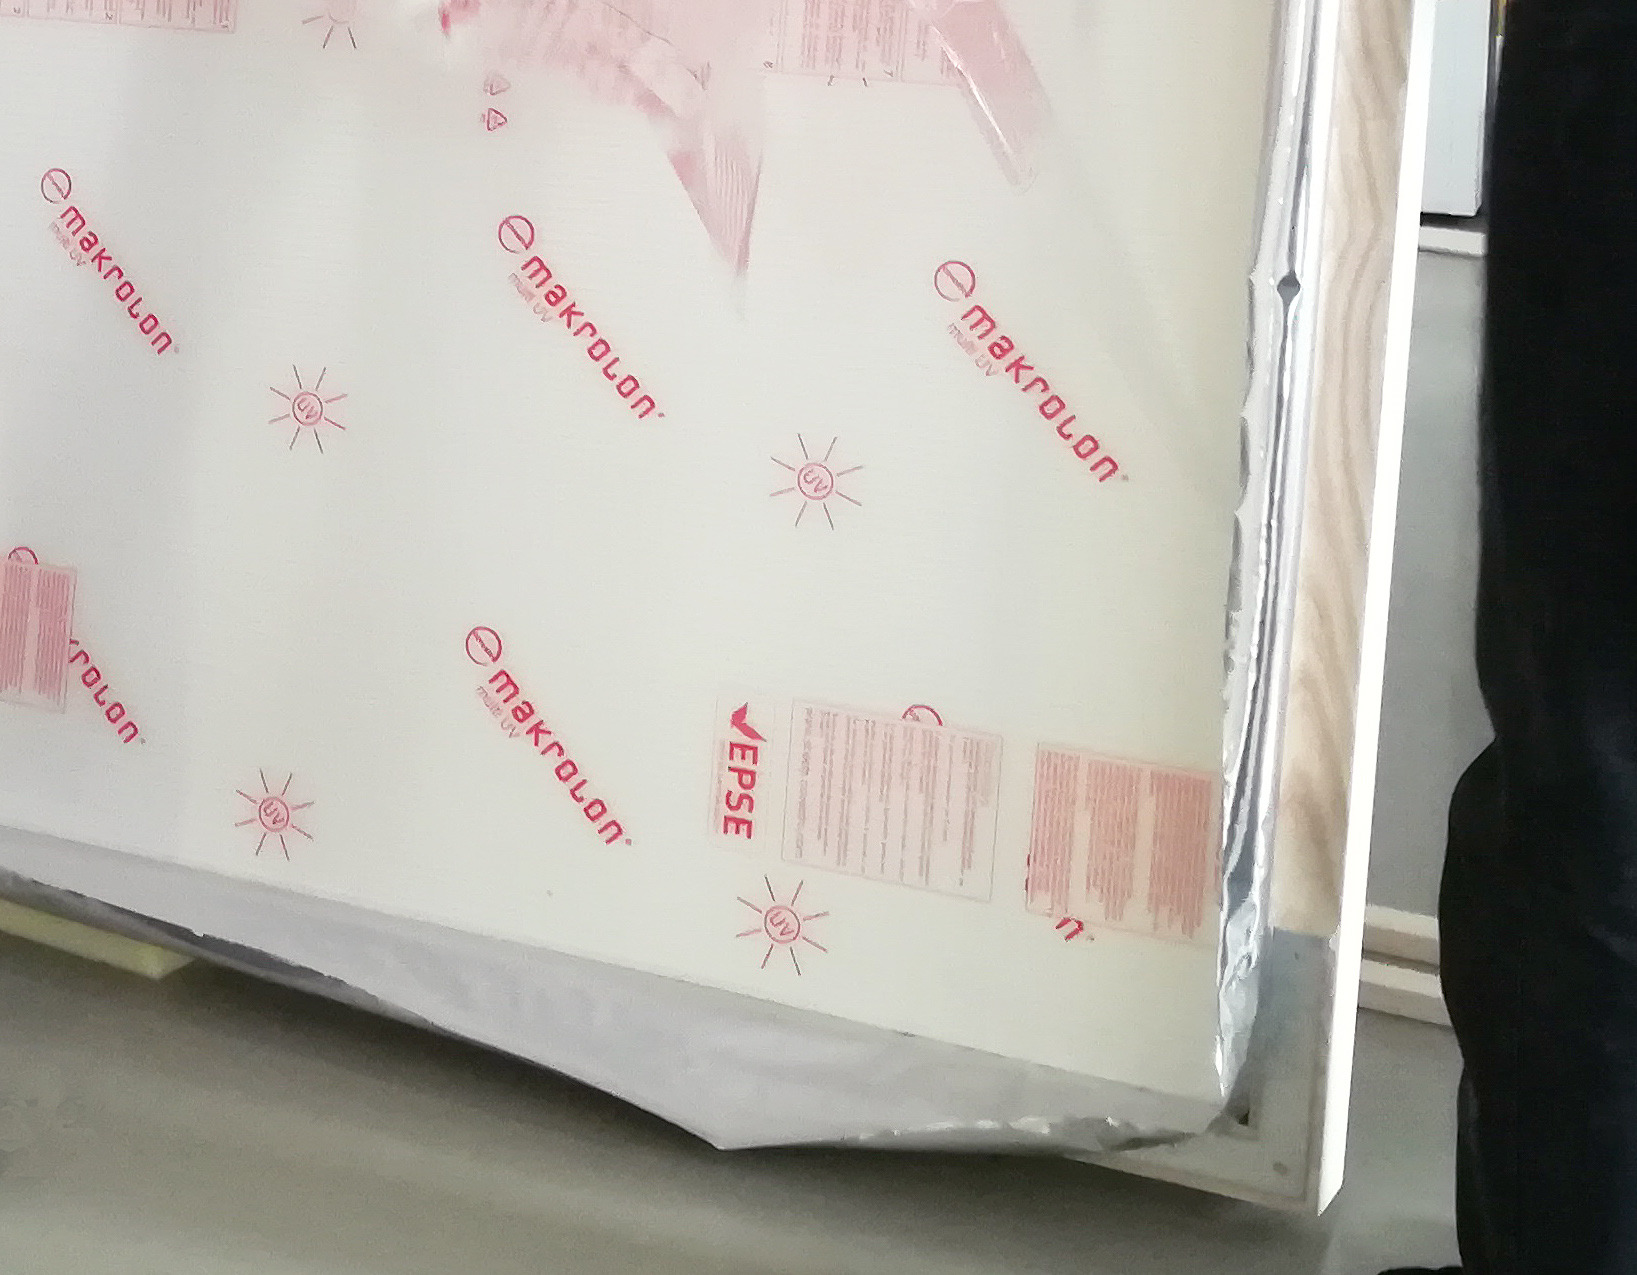
Seen here is one corner of the back of the frame during framing. The polycarbonate multi-wall sheet (still covered with a protective film that carries red printing) is inserted into the frame. It functions as a lightweight, water-impermeable and mechanically protective support. The vapor barrier film that protrudes along the edges is ready to be folded over and adhered to the polycarbonate sheet.
The blog can be cited as follows:
Selina Dieter, Irene Brückle, Ute Henniges. Local Stain reduction and framing of a large aquatint by Keith Haring. Blog of the 2019 MA thesis project of Selina Dieter, Study Programme Conservation of Works of Art on Paper, Archives and Library Materials, Stuttgart State Academy of Art and Design, 2023.